Monday, April 30, 2012

Big red laminated bowl-process and photos

Hi Everyone,

Well, it's been a rather trying day today and so I decided to go down to the wood shop and unwind a bit. I have that big laminated block of kempas, black walnut, and hickory and this is as good a time as any to get started on it so on the lathe it went.

Here we go:

This block is heavy and a little mangled so it's going to be a little unbalanced. I screwed it down firmly to the 3 inch faceplate and started turning the bottom and sides. You can see the bowl mounted on the lathe in the next two photos:


This is the bowl after about an hour of work. It's actually not as hard as I thought it would be and it's turning nicely. You can see the faint out line of the foot. It's taking some time as there is simply a lot of wood to remove.


Tomorrow (we'll do this slowly) I think I'll finish the outside completely, all the way through to finish sanding. Then we'll work on the inside. I think this will be a really nice fruit or salad bowl.

See you tomorrow,
VW

Sunday, April 29, 2012

Black walnut tea box finished-photos

Hi Everyone,

Well, the glue has dried and it's time to finish the tea box so here we go:

Here is a photo of the assembled pieces and the whole thing is ready for turning. I'm going to copy the box lid next to it-you may remember that this is the box lid for the tea box I made my husband.


The first thing I do is mount the blank on the lathe by clamping the knob portion of the blank in the 4 jaw chuck. then I flatten the sides and bottom and last cut a lip for the box and the tenon for the chuck so when I flip it over in a bit, the jaws of the 4 jaw chuck will fit into that recess:


Here it the lid with the underside completed:


These next several photos show the lid having been flipped over and the knob rounded off.


Here is a more intermediate step and you can see how the lid is taking shape:


And about an hour of shaping and sanding later, the lid is completed. Here is a photograph of the sanding box with lid:


And here are two photos of the box and lid with preliminary coats of oil:


The box will take several more coats of oil and then it will be put back on the lathe and polished and then sent out to my friend.  I don't know about you but I think it's time we stick a fork in and call it done!

Well that wraps up the weekend. Later this week I'm going to glue some more laminated blocks if the weather stays warm enough and I'll also begin turning the big red laminated bowl blank I made several weeks ago.

Thanks for spending the weekend with me in the wood shop and as always, there's always another wood working adventure just over the horizon....


See you soon,
VW


Lid for the tea box and a couple of trays

Hi Everyone,

Well the weather has certainly improved over yesterday and it's warmer. And I remembered I do have a piece of red colored wood so we can move forward and make a lid for the tea box. Let's go down to the wood shop and take a look:

I had a large piece of tiger wood in stock that had gotten shoved underneath a pile of hickory and so I pulled it out and cut off a portion large enough to cut a lid out of . I also had a smaller piece of Brazilian cherry suitable for a knob so I've marked them for cutting:


I've cut the lid into a circle and cut a small block for the know and left that square.  The knob serves two purposes: it provides an attachment point for the lid while it's being turned and it also provides a handle to pick up the lid. Since the whole lid-knob thing will be subjected to a lot of physical stress while turning, this whole thing has to be securely put together. So I've drilled holes in the knob and the lid and inserted a wood screw inside and then screwed and glued them together with superglue and clamped the whole thing together for an hour:


We'll come back to this shortly for turning. While the glue hardens I decided to finish a couple of trays out of black ash and hickory and here they are:


This is hickory:


This is black ash:


These will make really nice trays.

Ok, I'm going to finish a cup of coffee and go back to the wood shop and take a look at the tea box lid.

See you in my posting.

VW


Saturday, April 28, 2012

Today's posting #2-A Silk Oak Bowl

Hi Again,

It's freezing cold outside today and it's been raining since last night and I'm frozen like a block of ice at the moment so I'll be brief.

I made a bowl out of a block of silk oak that I've had in stock for a couple of weeks. I've never turned this type of wood and if I had I would have remembered it--this is a most unusual looking wood. And to beat all it has a scent that smells like ketchup!

Here we go:

Here are a couple of photos showing the basic block and a faceplate and a 4 jaw chuck. Both of these devices are designed to attach a piece of wood to a lathe. Since the block is very heavy, I'm going to use the faceplate first with some long heavy stainless steel screws to hold the plate on. The next photo shows the faceplate screwed onto the block and the whole thing screwed onto the lathe:


This photo shows the outline of the foot of the bowl and the tenon that I'm going to create to give the 4 jaw chuck something to attach too when I flip over the bowl for hollowing.


These next several photos show the blank being roughed out and in the last photo you can see the finished exterior with a foot and some preliminary sanding. The wood is actually a pink color and you can see the wild grain patterns in the side of the bowl:


These next two photos show the exterior of the bowl with the 4 jaw chuck attached.


These last several photos show the bowl about to be hollowed, the center one shows the bowl off the lathe and you can see the pink coloring.


This last photo show the amazing grain pattern. This piece of wood has what's called a lace pattern because the wood grain is arranged rather  like lace:


This bowl goes in the drying bag for the next 6 weeks, after which we'll re-turn it to a more usable size.

I'm soooo cold at the moment I can hardly speak so I'm signing off for now.

More later,

VW


Today's posting #1-Cedric's Bowl and the Tea Box lid

Hi Everyone,

Well, I finished Cedric's bowl:


As for the tea box lid: I thought I had some wide kempas boards in stock to make the lid from but I didn't. The only red colored wood I have at the moment is redwood:

...and I'm not sure I want to use this for the tea box. The lid will have to wait until I can get to a lumber yard for more wood.


I've also rough turned a bowl today out of silk oak and I'll make that the subject of my next posting. See you in a minute.

VW

Friday, April 27, 2012

Cedric the Cat and his new bowl

Hi Everyone,

Well, here's something  I don't do everyday--make a bowl for a cat! Here's the story of Cedric the Cat:

I have a lovely neighbor who has purchased quite a large number of my bowls (in fact she owns or will own more of my work than anyone else) and she is the owner of a very special cat named Cedric. Apparently he was living inside of a local Target store and was discovered one day when he was found by store employees tearing into a bag of dog food. He was taken home by one of the employees, who after a time found that they couldn't keep the cat and so the cat was given to one of the daughters of my neighbor, who in turn gave her the cat.

As a way of saying thank you to my neighbor for all the bowls she's purchased, and because I suspect the cat takes as much care of her as she takes care of him, I decided to make Cedric a bowl. Here we go:

I laminated a small block of wood out of some scrap hickory and black walnut and cut it into a circle:


I then put it on the lathe and gave it a very fancy shape. I think Cedric will like this:


I gave it a good sanding and flipped it over and hollowed it out:


These next two photos show Cedric's bowl from the top and the side:


And here it is with a preliminary coat of salad bowl varnish:


This will need to have several more coats of varnish so it will be easy to keep clean. I'll post finish photos in a couple of days.

As we're do to get snow tonight and early tomorrow along with rain and wind, I'm going to close down for now and come back tomorrow and we'll work on the tea box some more.

Have a lovely rest of the day,

VW

Tea Box out of black walnut and mahogany

Hi Everyone,

I have several small projects to do today and the first one is a tea box primarily out of black walnut for a friend's birthday next month. The second project is a bowl for a cat! Since these two projects are different, I'll do them in two different postings.

Tea Box

I've made quite a number of these over the past 8-9 months and I wasn't going to post all of the process photos. But there are a number of new viewers here on the SWW blogsite, so I'll give you all a run through on the process.

The tea boxes consist of two parts-the bottom for the tea and a lid. This posting will cover the bottom part.

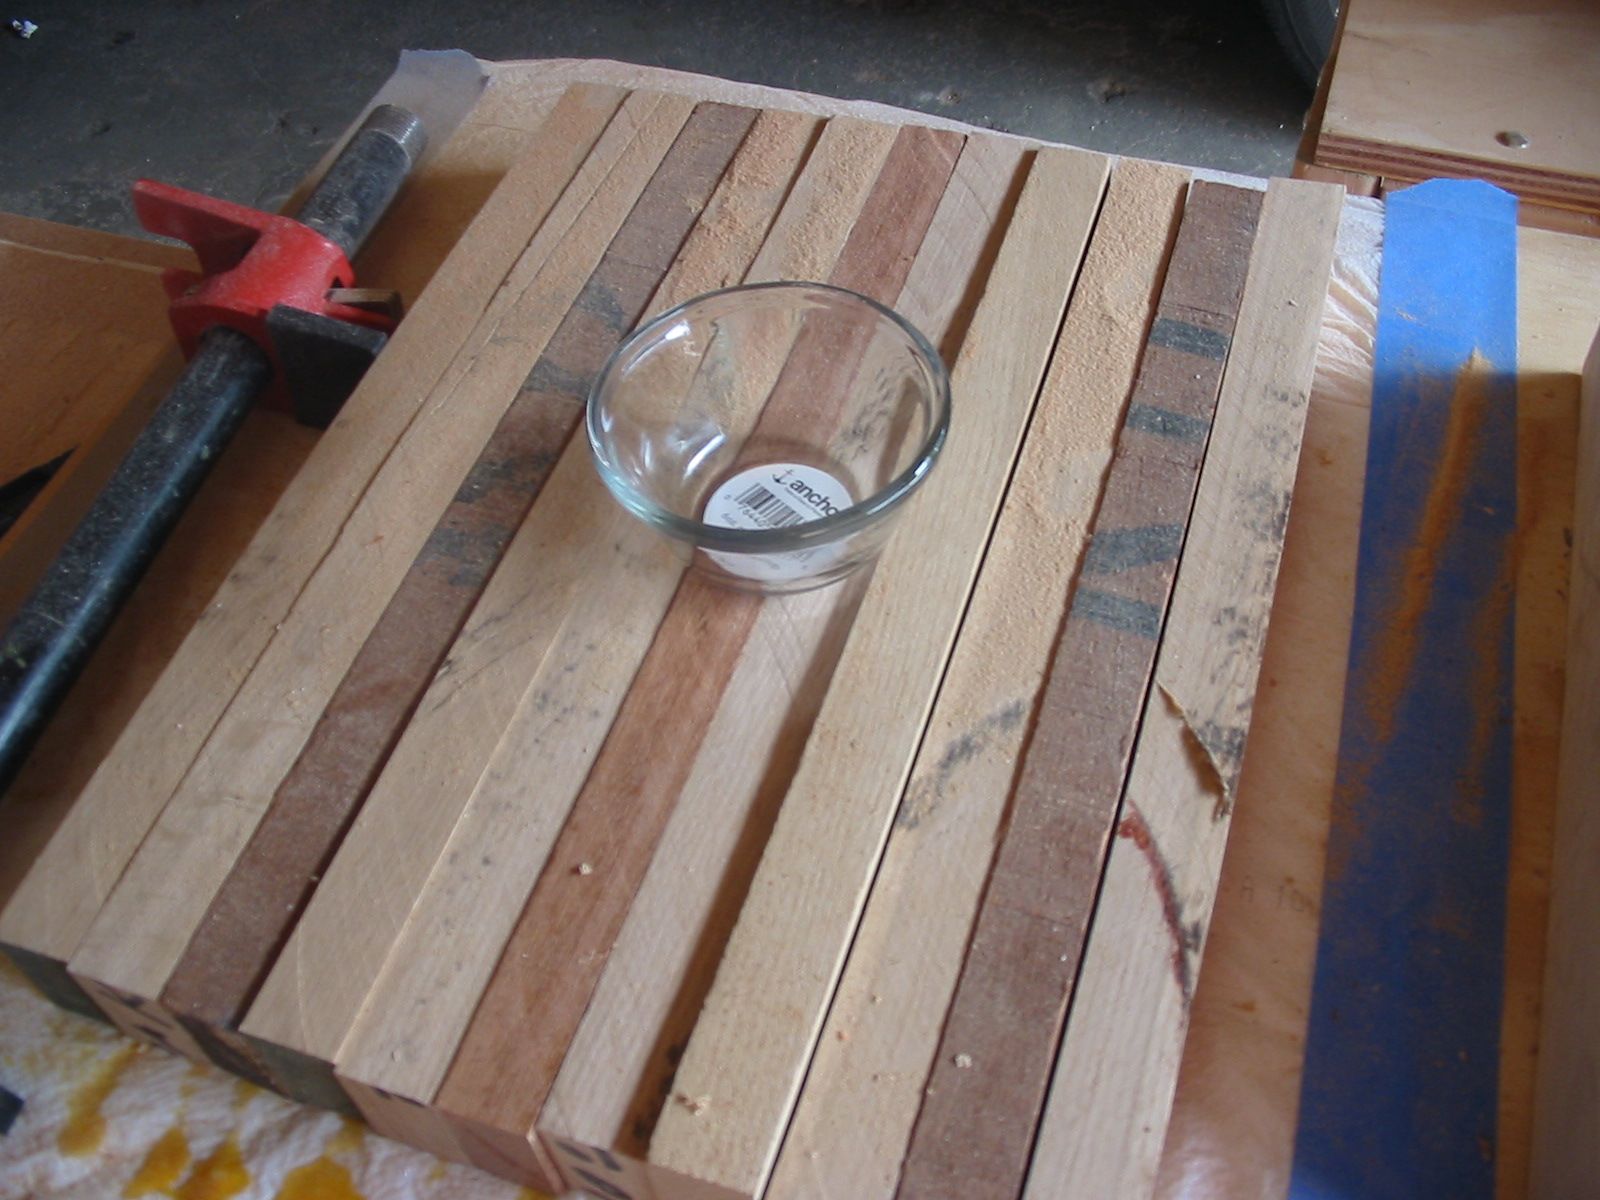
This particular box is made out of laminated walnut and mahogany. My friend likes walnut and mahogany and she does drink tea so this will be a welcome present.  Here are some photos:

These first two photos show the outside of the box. This is a very nice piece of wood and taking my time with this really paid off. The outside of the box finished beautifully.

I'm a great believer in taking my time with sanding as skipping this or skipping steps almost always results in a poor quality appearance at the end. I began sanding this with 60 grit paper and ended up with 400 grit paper. While I am careful with my cutting technique, beginning with 60 grit, really gets rid of small scratches and end grain problems.  The finished surface in the second photo shows how smooth wood can become with proper sanding.


Let's flip the box over and work on the inside.

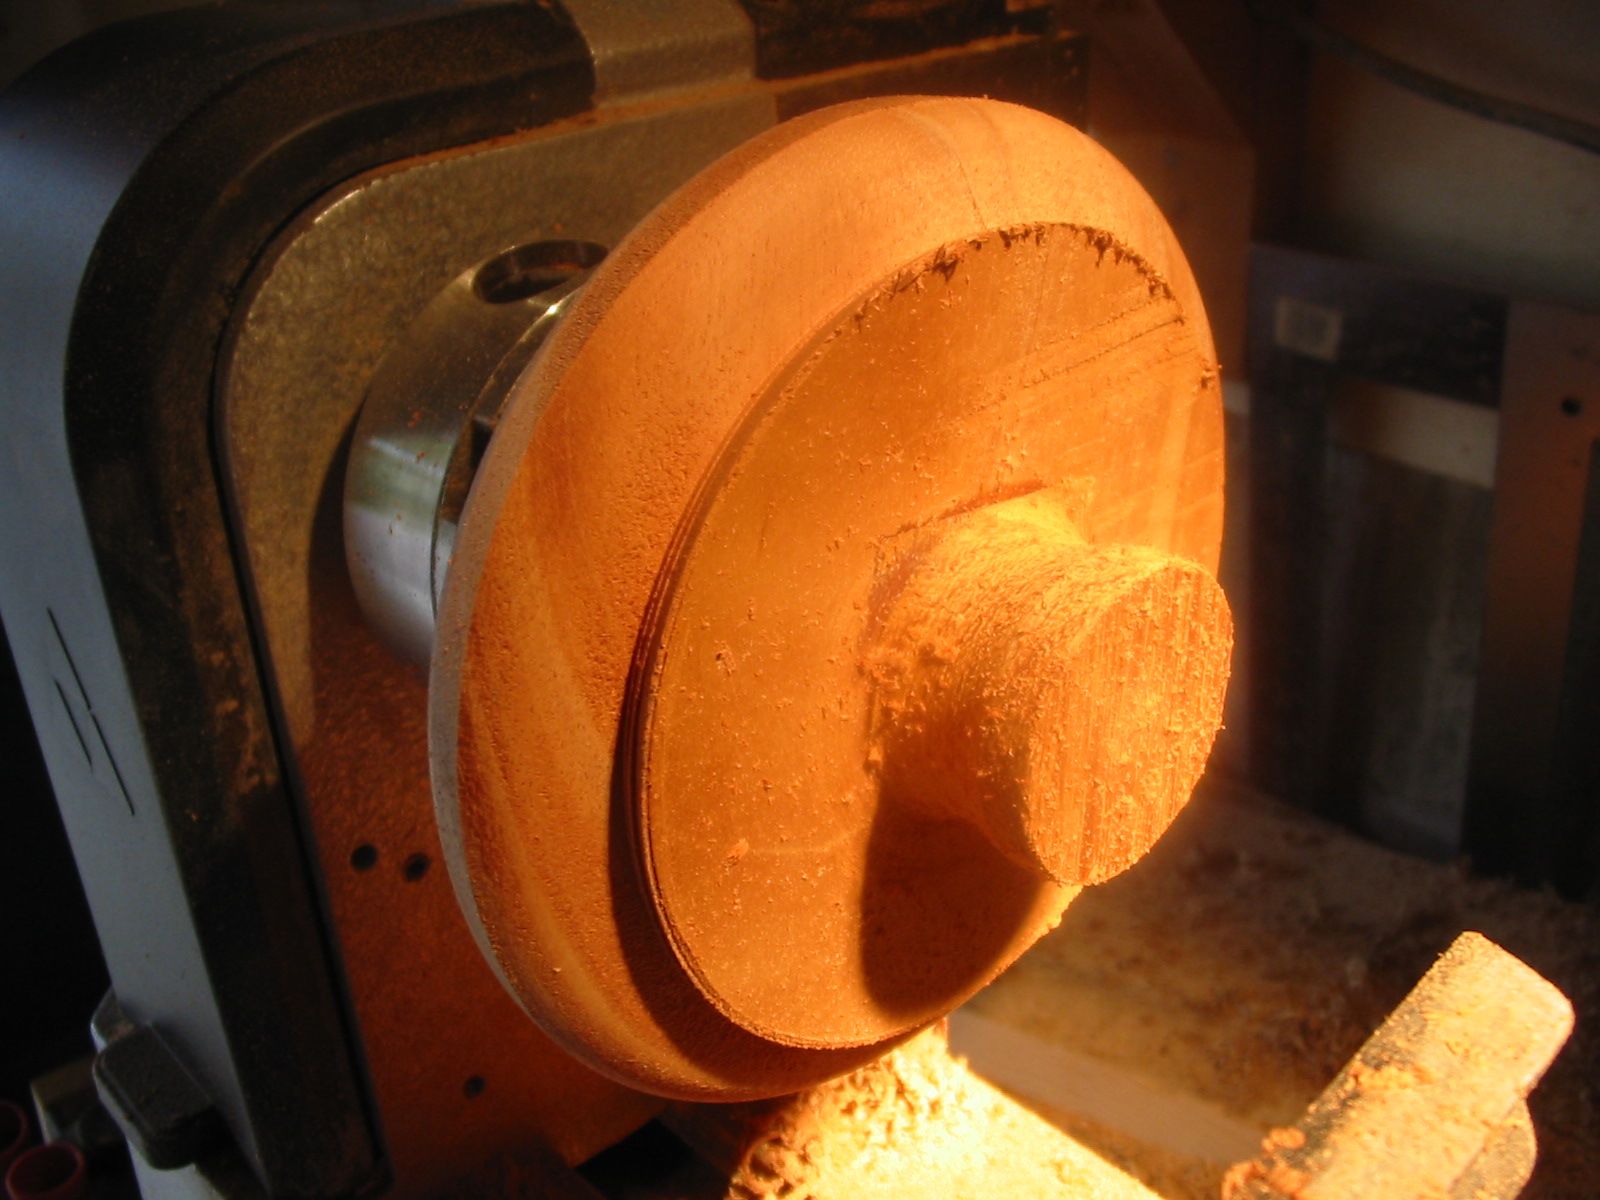
Here are two photos of the box being hollowed out:


This second photo shows the how the inside can easily become rounded, and while this is a good thing in a bowl, I prefer the inside of a box to be more squared off in shape. The best way to do that is to scape the inside of the box with special scrapers and you can see those in the next photo after this one.


The tool with the rounded end is a bowl scraper and it's designed to be used inside on the bottom and sides of a bowl and the tool next to that has a square profile. That scraper is designed to be used in the corners of boxes. Both of these will give a smooth finish if used slowly and carefully.


These next two photos show the inside finished and smoothed:


Our next step in the tea box is the construction of a lid. I don't have any mahogany in stock right now so I'll make one out of kempas wood. As it's beginning to get cold and windy (my shop isn't heated) I'm going to make a lid tomorrow and I'll take you through this process then.

Let's go to the next posting and talk about a very special cat.  See you in a minute.

VW

Thursday, April 26, 2012

Laminated blocks and a tray from black ash

Hi Everyone,

It's a gorgeous afternoon here in the Twin Cities--the temperature is warm, the sky is blue and it's perfect turning weather. Here's my afternoon:

I've tried to take advantage of the warm temps and cutting and planning several laminated blocks for a bowl and several serving platters. Here is the bowl block-it's made out of kempas wood, hickory, black walnut, and rosewood:


This is going to be a tea box. This is made out of black walnut and mahogany:


This is a block that is going to be glued tomorrow. It's going to be made out of white oak, black walnut, and kempas. This is also going to have a section in the middle to accommodate that small glass bowl. This will eventually become a dip and chip platter:


This small block is going to become Cedric the Cat's bowl. This is made out of scraps of hickory and black walnut:


This is another dip and chip platter out of hickory and black walnut:


And for those of you who have been hanging around the wood shop a long time-you'll remember the large black ash plank I bought last year. It became many platters for friends and this is the last little bit of it. It became a small serving dish:


I'm going to have to go and see if I can get some more of this.

Yesterday I told you about my tree so I decided to take a photo of it and show it to you:


We had some wind this morning and it blew a lot of the blooms off, so much so that they look like snow:


Speaking of which, we're supposed to get snow either tonight or tomorrow....sigh, only in Minnesota....


See you tomorrow.

VW