Friday, October 17, 2014

More sanding tips

Hi Again,

I have another sanding posting for you. This one is a video from Sam Angelo at Wyomingwoodturner. This video has more details than the previous posting. It's 13 minutes long but really worth watching:


This is a link to  Sam's YouTube channel . He's got lots of videos to watch. 

And here is a link to his website: Wyoming Wood Turner

I've got a large laminated hickory bowl to finish and I'm going to try some of Sam's suggestions and I'll post about them later next week.

Thanks for stopping by,
VW

Tuesday, October 14, 2014

Sanding Article by Betty Scarpino

Hi Everyone,

Woodturning Online has an article about sanding by well known wood artist Betty Scarpino. You can access the article online at this link: Betty's Lathe Sanding Secrets.


VW

Thursday, October 9, 2014

Dining Room Table re-do:Pt.5-Finish photos

Hi Everyone,

Well, the table is finished and I'm using it to type this posting on. I'm quite please with the way it worked out. The table is strong and very stable-it doesn't rock. And I think this new base gives it a more contemporary look. The total price for the lumber was $42.00 so it was an economical re-do as well.

Here are the photos:


And of course it's been cat approved:

This one is done.

I'm not sure what my next project will be so I'll have to cogitate a bit on that. I could use some shelving in the shop and I need to split a walnut log and a couple of box elder trunk sections and I may just do that to get myself ready for winter turning. I also need to sharpen everything and replace my bandsaw blade, which is barely cutting anything (although I did cut open an acorn squash last night). So stay tuned. There's always another adventure ahead.

Thanks for stopping by,
VW

Tuesday, October 7, 2014

Dining Room Table re-do:Pt.4: Finishing up the Base

Hi Everyone,

Well, I've had a rotten head cold the past several days and so I'm just getting to the dinning room table build. Jim and Critter gave me a hand with it as I'm dripping snot everywhere and I'm running a fever. Talk about giving one's all.

Here are the photos:

This is the table base. I re-used the original frame from the old table base, and screwed on the table leg assemblies in their place. The frame needs a 2x4 placed between the 2x4s between the legs. I'm adding this for stability. And of course the cats have to add their two cents worth:


And here is the 2x4 in place. The table base construction is now finished. All the remains is to screw the whole thing down to the underside of the table top:


Here's Jim giving me a hand screwing the frame down. We even re-used the original screws:


We turned the whole thing over and set it on the floor and it rocked just a little bit so we turned upside down again and loosened the frame, added 2 shims and then screwed the frame down tightly. No rocking this time:

 And then we signed and dated the shim. A zillion years from now when the next owners decide to re-do this table, the names and date of Jim and I will be there:


Ok, I'm going to varnish the table base. I'll post the finish photographs later this week.

Stay tuned,
VW

Saturday, October 4, 2014

Dining Room Table re-do:Pt.4: Working on the Base

Hi Everyone,

I spent the afternoon with my husband building a wooden base for the table. Unfortunately we couldn't find all of the pipe parts that we needed so we switched gears and made a wooden base and for my money, I think it looks great. Here's the story and photos:

When we couldn't find pipe parts, I had to move quickly to plan b: a wooden base. We went to a lumber yard and purchased 4 4ft. cedar porch posts and 5 cedar 2x4s and came home and set to work. I had the measurements from the old table base and we set about to create a new base that corresponded to those measurements.

In this photo you can see the posts. We cut all four of them down to 27 inches long. The grooved ends will sit on the floor:

Here they are all cut:

 The we cut one of the 2x4s to 27 inches long and screwed between the cedar 4x4s. This comprised a table leg assembly and we made two of these, one for each end of the table:


Then we brought up the assemblies and a bunch of clamps and levels and assembled the base using the frame from the old base (that's the part you see with the level sitting on it):


One we got the entire structure level and sitting square on the floor, I screwed the frame to the legs:


The next two photos show you what the table looks like:

I still need to cut and install a stretcher between the 2x4s and then it will be finished. All we'll have to do then is screw the base to the underside of the top and then apply polyurethane to the base.

I'll be finishing the table tomorrow and I'll post more photos then.

VW

Friday, October 3, 2014

Dining Room Table re-do: A Face lift for an old friend-Pt.3: finishing off the table top

Hello Again Everyone,

Yesterday, after the mineral spirits dried, we brought the table top back inside of our house for the finishing steps. It's getting cold here and I was afraid the finish wouldn't dry. And it's a lot more comfortable working inside right now!

Here are today's photos and comments:

The top stayed inside overnight and this is what it looked like this morning:

Here is a closeup of one of the corners. I looked at the surface and noticed that the color was uneven-you can easily see the blotchiness and it appeared to me to look a little too beat up. So I decided to apply a pine stain over the top to even this out. To begin this process I applied a wood sealer to the surface and let it dry, which took about 50 minutes. After it dried I noticed the color had evened out and a lot of the blotching became invisible. So at the last minute I changed my mind and decided to apply the polyurethane to the surface:

This is the top after after I applied the polyurethane:

And this is the same corner in the photo above. I think it looks better and it didn't remove the "worn" appearance of the surface. I'm going to let this dry and this evening I'll apply a second coat of polyurethane and then the top will be finished:


Tomorrow, I'll do the bottom frame and then the table will be complete and ready to be used again.

Stay tuned,
VW

Thursday, October 2, 2014

Dining Room Table re-do: A Face lift for an old friend-Pt.2: cleaning off the varnish

Hi Everyone,
I'm back. I've gotten the top cleaned off and I'm amazed at how easy it was. Here's some photos and explanations:

I really flooded the top of the table with remover and left it for about 40 minutes and came back and you can see how the varnish is bubbling up:

The old varnish and the remover came right off very easily. It took about 10 minutes to completely scrap off the top and edges:

There were still a few spots of varnish left so I gave the top another thin coat this time and removed that after about 15 minutes-it's down to bare wood now:


I took the scraper and scraped it completely clean. I think took a paper towel and removed any remaining blobs of remover and then I scrubbed the top well with mineral spirits and a nylon scrub pad and here it is, all cleaned off:


I was really dreading this part of the project. In the old days, before dinosaurs, paint removers were really nasty. They took multiple layers of remover to get paint and varnish off of wood and it burned your skin if you got some of it yourself. It was a mess to clean up and it turned anything it touched into jelly. I used Citristrip for this and it worked perfectly. It's easy to clean up and it really took off all that old varnish very easily. I'll use this stuff again in the future.

I looked at the table carefully as sanding was going to be my next step. The table top is pine and it was originally a bright yellow color but it has darkened over time. That and it has a million dents and a lot of wear and I kinda hate to remove all that. Sanding it would just turn it back into a wooden table top and erase it's history. And we all know the wood fairies wouldn't be too happy with that so I'm going to rub down the table again with a nylon scrub pad to make sure the top is completely remover free and just leave it alone. I'll rub wipe on polyurethane next.

Now tomorrow, I'll go and get the pipe for the bottom. I plan to re-create the trestle base out of pipe and you'll see how easy it is to do this. I'll provide a list of the pipe I use and lots of photos so stay tuned.

See you tomorrow,
VW

Dining Room Table re-do: A Face lift for an old friend-Pt.1 discussion and plans

Hi Everyone,

Well, today is the day-I'm finally re-finishing and re-constructing my dining room table. I've wanted to do this for years but something always got in the way. TODAY IS THE DAY!

A bit of history first:
I built this table when I was first married, over 30 years ago, before I had kids. It's made out of pine and it was finished with spar varnish, which I thought at the time would be a good, rugged finish and I was right it was. But over the years, it's really gotten quite worn out. It's gone through countless meals, homework projects, my husband and I both studied on it, and lots of family meetings, discussions, you name it. It's a part of our family and our history - in short, my old friend needs a re-do.

Plan
First I'm going to remove the top from the base and take it down to the shop. I'm planning on stripping off the old varnish and lightly sanding the wood smooth. I don't want to remove all the dents and dings as this is a part of it's history and I want to preserve that. Then I'm going to measure the old wooden base and re-create it with black iron plumbing pipe, probably 1 1/2" in diameter, and screw that on to the underside. I'll then finish the top with wipe on polyurethane, which is much easier to apply and maintain as it wears out; this type of finish didn't exist then!

Ok, here we go:

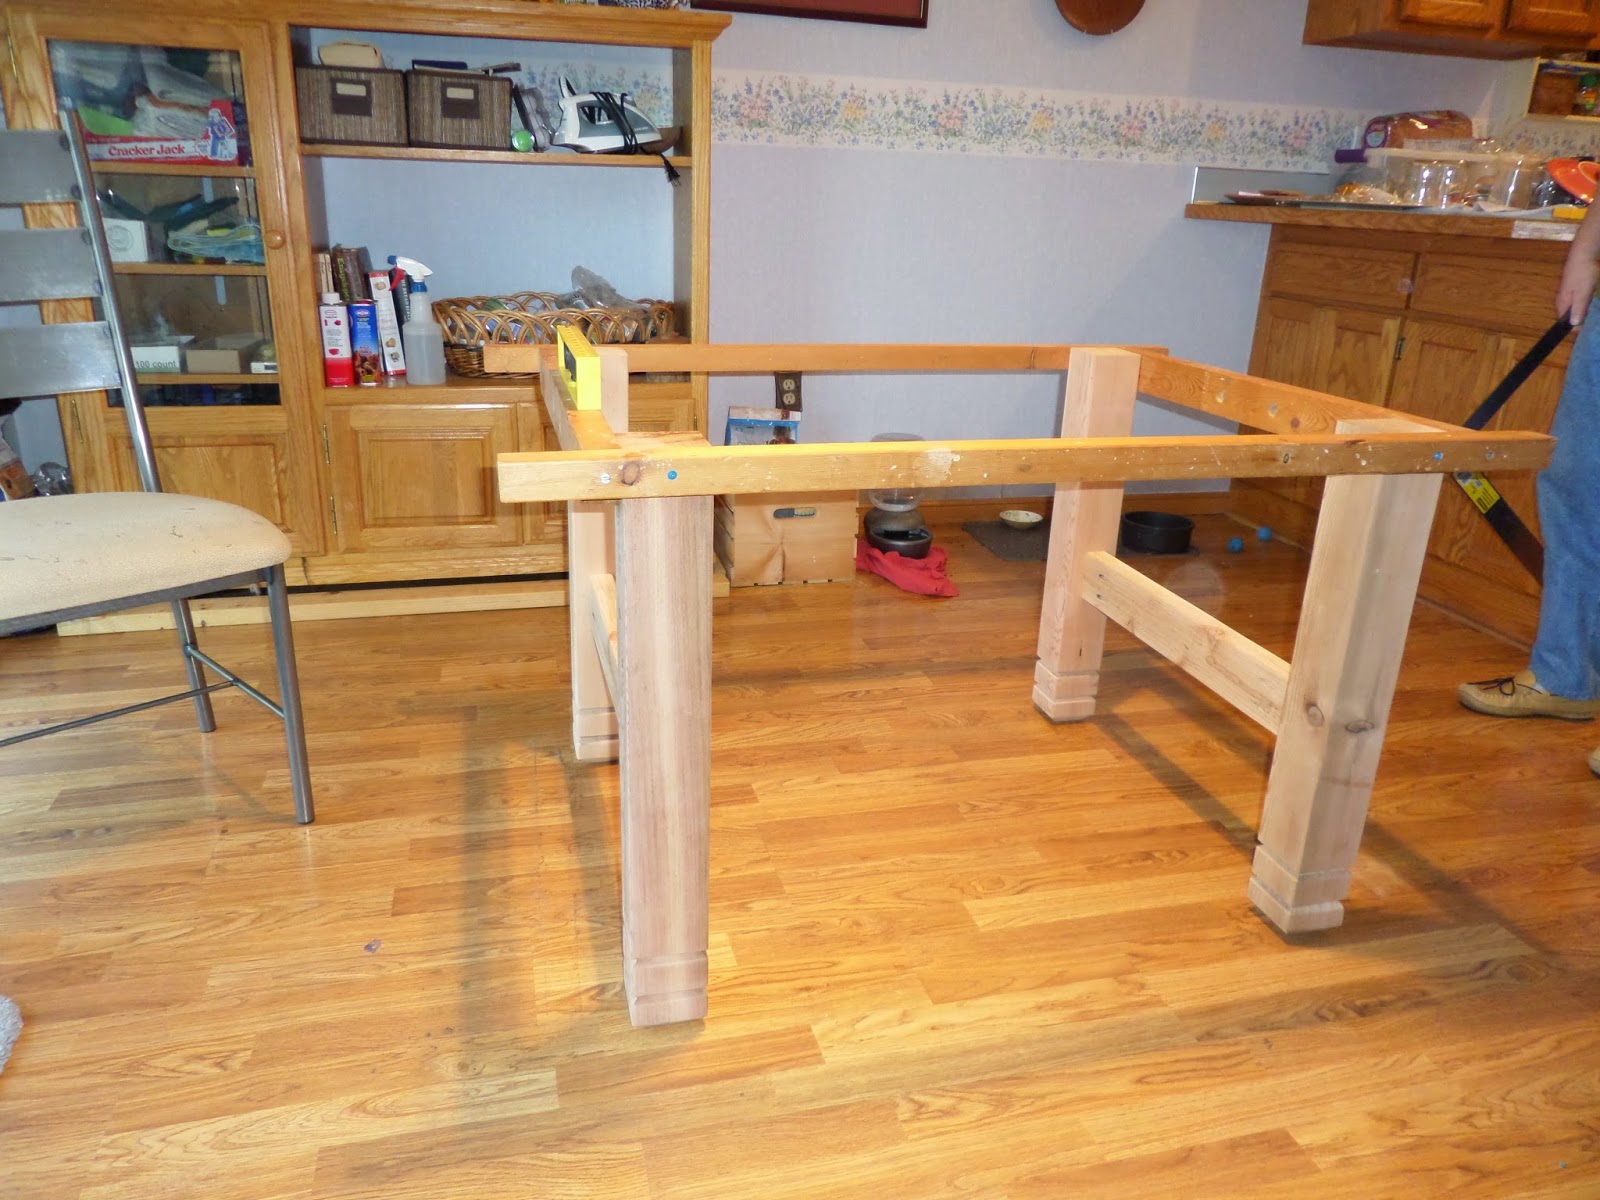
This is the original table with the pine top and pine base. I painted the base years ago as it was very worn out and dirty from crazed toddlers, cat puke, and other assorted delights:


Here is a closeup of the top. It was made out of laminated knotty pine:


And of course the cats had to get into the act...

Here is the underside of the table. I'm going to remove the screws that attach the base to the underside and then take the top downstairs:


And here it is downstairs-I've got a jug of paint and varnish remover, a paint brush to apply the remover with, a scraper, and some gloves and my safety glasses:


And before I began, I rounded off the corners of the scraper so I don't inadvertently dig the corners into the surface of the table:

This remover really works. It was beginning to remove the varnish even before I finished applying it:


And here it is covered with remover:

Now, I'm inside typing this and I'm going to make a sandwich for lunch and then go back down and begin scraping off the old varnish. I'll be back shortly with more photos. 

VW