Sunday, June 30, 2019

Bedside Table Project-finish photos and final notes


Hi Everyone,

It's finished.
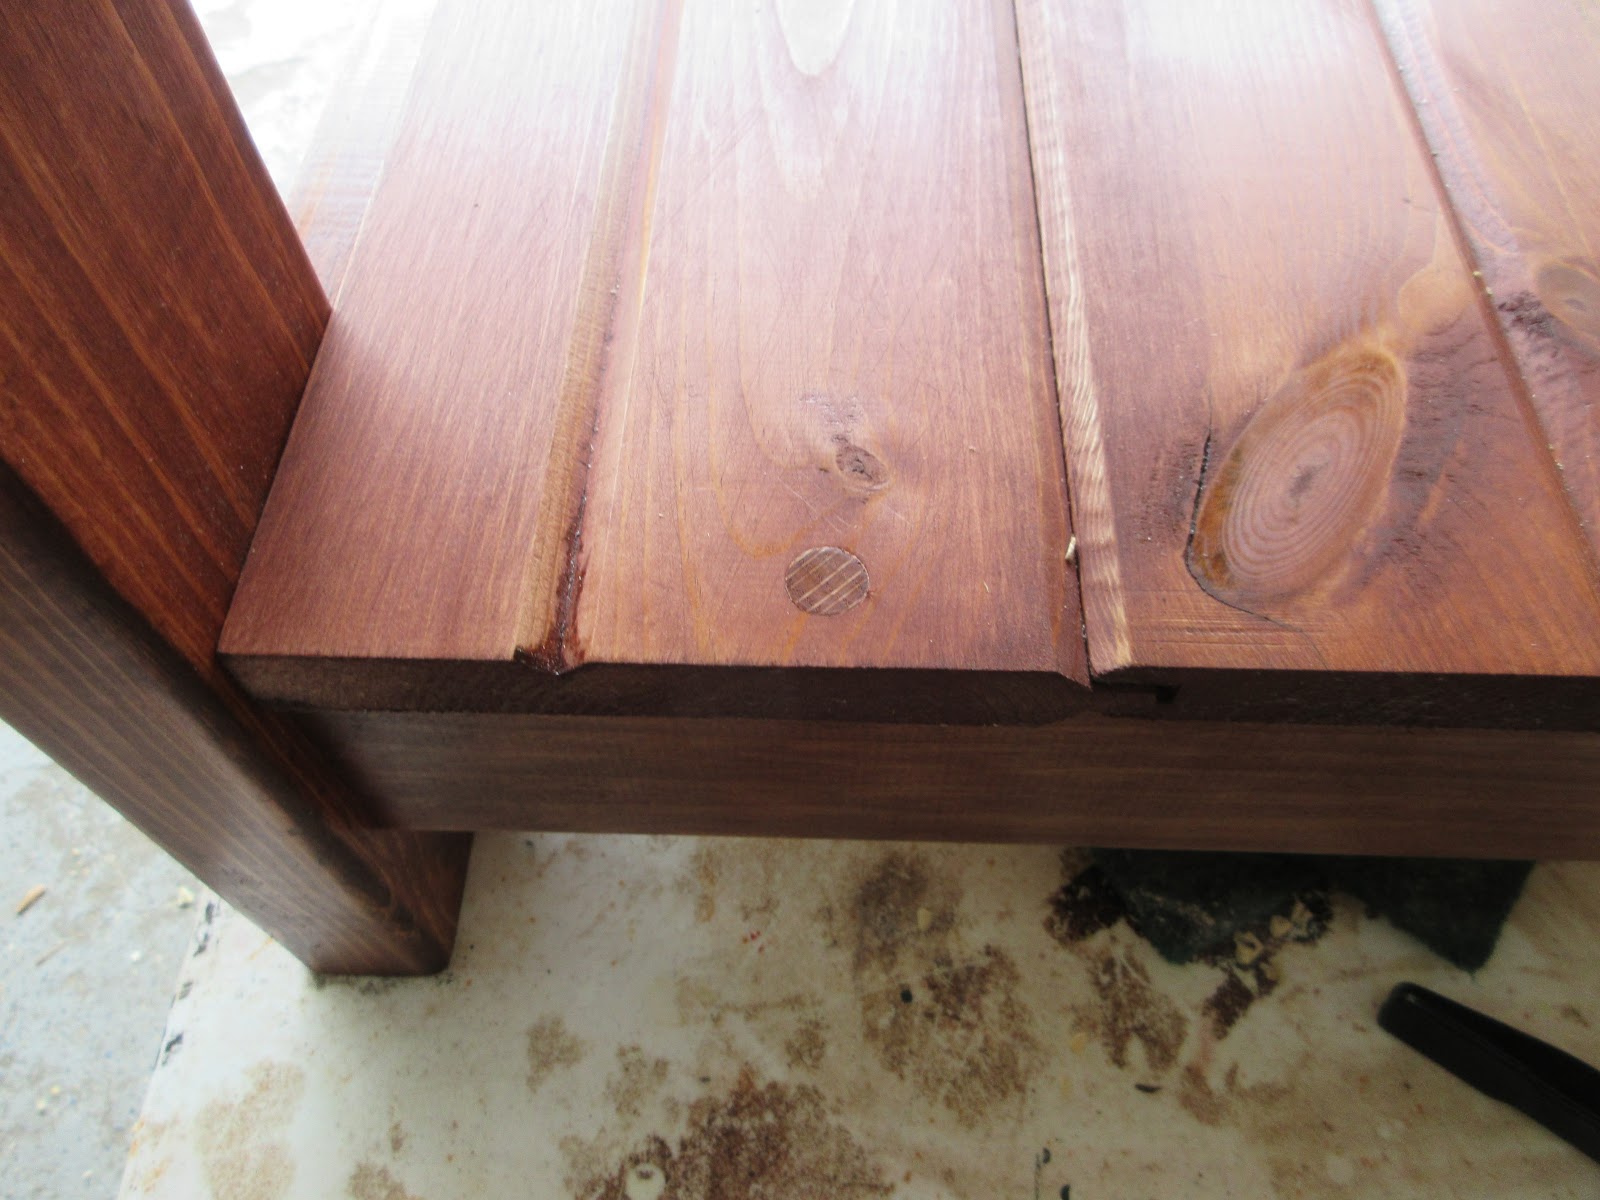
I'm happy with the look of it overall and it's strong and stable. Adding all those screws to it did the trick:


 Some parting notes:

I don't think I'll use shiplap pine again for a top or a shelf without a strong frame around it and underneath it. There was just a little bit of movement when I was picking it up and working on it and I think it possibly could have broken in half had I handled more.

The stain color is different from the other table I made long ago. I'm not sure if the manufacturer has changed the color or if the color on the other table has faded a bit. I would prefer it a lighter shade and so in the future when I make the bed headboard I've been planning I'm going to experiment first with mixing and matching colors first.

But the table is strong and there's no movement in the top or shelf when we picked it up so time to call it a day with this one.
_________________________

Next project

I'm thinking of making a long low console for my living room that I could place either some baskets for storage or make some drawers for all the stuff around the living room. I'd like a less cluttered look as my living room is smallish. More on that as it develops.

Anyway, thanks for dropping by the woodshop and stay tuned for the next adventure!

Best,
VW

Friday, June 28, 2019

Bedside Table Project-final assembly

Hi Everyone,
Well time to attach the bottom shelf and top.

This was just a very simple drilling and screwing down of the panels. I used a 3/8" Forstner bit to countersink the screws with and then inserted a 3/8" oak plug on top of each screw to hide it:


I use a plastic mallet and a nail set to tap the plugs into place:


Here's the top and I did the same thing with that. It's firmly screwed into place and can be picked up by the edges of the table top:


And here are photos of the top with stain applied...

And the whole table assembled:


Tomorrow I'll put on the first of several coats of polyurethane and then it will be finished.

Stay tuned,
VW

Wednesday, June 26, 2019

Bedside table project-working on the finish

Hello All,

Well when I came back outside this morning I decided just to place the top and bottom shelf on the frame just to see what it looks like and I think the proportions are just right-if I don't goof this up, I'll have a really nice table with a large top for books, reading lamp, and other stuff:


I proceeded to take the shelf and top off and rub down the stain on the framework and it looks ok. The color is darker than I wanted and I'm not sure why-it's the same color I used years ago on the other bedside table. The stain gives the frame a rustic look, which I like, but the color is off. Oh well, nothing I can do about this now:


Now on to the top and bottom shelf: the top is dry and it's sturdy and it looks good. I'm glad I cut it to size yesterday as that makes handling it easier:


I'm going to have to attach it to the frame when it's done and I sat down and dithered about that for a while. While the frame is strong and stable I'm used to building things really strong and so I'm going to strengthen the structure by firmly screwing the top and bottom shelf onto the frame, which means I'm going to screw it down from the top to the frame. So I turned the frame upside down and placed it on the top and marked it for drilling:


I'm going to use  #6  1&1/2" wood screws to attach it and wooden plugs to cover up the tops of the screws.

I finished up the afternoon by staining the top and bottom shelf to match the frame and I'm leaving everything to dry completely. Tomorrow I'll begin applying poly urethane to all the parts:


See you tomorrow,
VW

Tuesday, June 25, 2019

Bedside Table project-building the top and bottom shelf

Hi Everyone,

I sat around and debated what to make the top and bottom shelf out of. Originally I was going to purchase a laminated pine panel and make those parts out of that. Except that I couldn't find any laminated panels locally (I guess everyone is out building tables at the moment) so it was on to plan B.

I wound up finding some clear ship lap pine on sale. The boards were 36" long and 8" wide and in good condition so I bought 8 of them and took them home and began making panels out of them.


I made the bottom shelf first as it's smaller and easier to move around. The bottom shelf required 3 boards trimmed down to 25 inches long. Next I trimmed off the edges of the two outer boards which left them about 5 inches wide. All three came to 18" wide and this will fit the bottom rails just fine:


I took the boards, ran a bead of glue along the groove in the boards and clamped them together. They should be dry enough to take out of the clamp later tonight:


I did the top next. The dimensions of the original table's top are 27"x27" so I proceeded to make a table top with those dimensions. This isn't glued up or attached to the table frame yet but this is roughly what it will look like when this is glued and dried:


I'll glue and clamp this later today.

Tomorrow I'll stain the frame and the top and bottom shelf and begin the finishing process.

Stay tuned,
VW

Monday, June 24, 2019

Bedside Table project, continued: assembling the frame

Hi Everyone,

Well, I spent part of the afternoon assembling the frame for the table. I checked and re-checked and clamped and unclamped the parts and finally got everything straightened out:


And as soon as I finally got that figured out, I screwed it together. It's stable and doesn't rock:


Tomorrow I'll get going on the top and the bottom shelf-that will make the frame even stronger. And when I'm done with that it will be time for the finish.

Stay tuned,
VW


Sunday, June 23, 2019

Bedside table project-discussion and plans and beginning build

Hello All,

An itty bitty part on my tablesaw broke and we finally got it fixed and up and running so for my first official summer project I'm making a simple bedside table for myself out of pine from the local big box store.

Discussion and Plans

A long time ago I built a similar table for my living room and at that time all the tools I had was a hand saw, a small power sander, a very old corded drill and a box of bits and some glue. I didn't even have a table to work on so I built it on the floor of my garage. Happily the table came out well and we've used it for years. My husband currently uses it as a bedside table on his side of the bed. Since I'm back to working again I've decided to coordinate the things I build so they match - hopefully everything will look more intentional instead just thrown together.

The table will have a frame made out of simple construction grade 2x4s and 1x3s pine and have a solid pine top and shelf underneath. It will be stained sedona red and finished with polyurethane, both products by Minwax.


I'm using Kreg screws and the jig to build with.

And I'll probably use a glued up pine panel for the top and bottom shelf.

Very simple and it can be modified to make a taller or shorter table or any table of any size for a living room or a den.

Ok let's get started:

Photos-

Cutting the parts was simple and I did that on the table saw:


Once I cut the legs I clamped them all together, measured 20 1/2", and trimmed them on the table saw so they're all exactly the same length. I did the same thing with the apron pieces at 18":

I drilled the holes for the screws into the ends of the aprons:


And proceeded to assemble the ends of the frames. I used 1/2" thick pieces of plywood to inset the apron parts 1/2" from the face of the 2x4s:

Here's a side view of the plywood spacers:


And I checked everything for square and screwed the parts together:


And this is what one end of the frame looks like. I made two of them and then stopped for the day:


Ok, tomorrow I'll assemble the rest of the frame, apply wood sealant to it and stain it. And I'll make a decision about the top and bottom shelf.

See you soon,
VW


Friday, June 7, 2019

Chair Seat Project-finish photos

Hello Everyone,

I'm sorry I didn't get back to this project - my old camera finally bit the dust (literally) and the new camera and I are warring back and forth. But I managed to get two photographs out of it so I can show you how this project went.

As a recap: the chair seats on my old dining room chairs were filthy and completely worn out and badly needed replacing. Originally I planned to re-upholster myself. When that didn't pan out, I used some scrap laminated pine panels to cut out a new set of seats.

From there I painted them a rust color to match the dining table. I used Behr Home Decorators Collection oil based paint in a rust color and I gave each seat 2 coats with 6 days of drying time between coats so the surface would be really hard. And I'm really happy with the way they came out:


And this is what they originally looked like:


I've got all 4 chairs done and now I can invite friends over for dinner. Anyone hungry?

_________________

OK, I'm working on making a corner shelf for the tv monitor in my living room. It's also made out of a laminated pine panel and for this one I'm going to stain it gray and add some detail to the surface so be sure and stay tuned for that. When that's done a cabinet for my living room radio is in order and I'll post about that too.

Well, thanks for dropping by and I'll see you soon!

VW