Welcome to the Turn-O-Rama. This is the third time I've done this and this year I'm posting the project early (Mother's Day in the US is May 10th) so those of you who would like to try the project will have time to do so.
Discussion
This project is aimed at the beginning turner who would like to make a special present for his or her mom. It's a very simple small box that can be used as a jewelry box or as a gift box for a special present. You can make it the size that I have made it or you can make it smaller or larger as well. You can embellish it any way you like or you can leave it plain. It is designed to be turned on a lathe with a special turning chuck (more about that shortly) and this is what it came out looking like:

It was fun to do and it took me several hours of turning to accomplish. It may take you a little longer but you will come out with a nice box at the end. I'm certain of that.
Your goals for this is to produce a box, with a well fitting lid that doesn't wobble about on top of the box. You should also plan on using some simple turning tools for this, including a skew chisel. And you will get some practice producing a smooth finish with your tools instead of relying on sanding. So off we go!
Plans
I used a small, 3 1/2"x 31/2" x 7" block of laminated red oak for this project:

I am also assuming that you have a basic set of turning tools for this. I used a roughing gouge, a 1/2" and a 1/4" turning gouges, a parting tool, and a skew chisel. You will also need to have a basic turning chuck like the one in the photograph. This is a Nova G-3 wood chuck and you can see by the photo that I've used that thing to death. It is a well made tool, had many uses, lots of accessories, and it has held up well over the years. The project is designed around the dimensions of the jaws and you will see how the project fits on the lathe as we progress:

Ok, let's get started!
First, find the center of the ends of the block by drawing intersecting lines on the end of the block just like I have in the photograph and also take an awl or a nail and make a small hole at the point where the lines intersect:

And draw a 2" circle on each end as well:

Mount the block between centers on your lathe:

This is what it should look like. Make sure you've securely clamped the tailstock down. The block of wood should be tightly placed between the headstock and the tailstock. Insert the tool rest in the holder and make sure that the edges of the block don't hit the rest-hand turn the block to make sure of this:

Ok, time to begin turning. Turn on the lathe and with your roughing gouge, turned the block into a cylinder. Go carefully.
When you're finished with this step you will need to cut a tenon on each end of the cylinder. They should be about 3/4" long and about 2" wide:

Here's a closeup. The tenon should be slightly dovetailed as you see in the photograph. You will be mounting the block on the lathe by fitting this tenon into the chuck jaws. Make sure your tenon is long enough. If it's not, the chuck jaws won't be able to securely hold the block it place while you're turning:

Closeup shot:

Cut a tenon on both ends. Your block should look like this:

And it should fit securely into the chuck like this:


This heavy line is where I'm going to cut the block into 2 pieces. I took my parting tool and partially parted the two sections. I finished cutting them apart with a small hand saw. I just locked the lathe in place and left the block between centers. A very easy way to hold it still while cutting it apart (and no! don't use the saw with the lathe tuned on):

And here we are-two turning blocks out of one. Set the lid aside and let's work on the body of the box first:

Here is the body between centers. You can see two lines on the left hand side of the block. The first line deliminates a waste section. The second line deliminates a section that will become a small bead on the bottom of the box. The rest of the wood will become the body of the box:

Begin turning. I smoothed the body and then I began to turn down the box so the foot will be narrower than the opening of the box. You can make the box with straight sides if you wish:

I also took the skew and began to turn the bead:

Here you can see the box taking shape. I also made the box just a little bit shorter:

This photo shows the bead at the bottom of the box. I cut the surface of the box and the bead with a skew and I'll further refine the bead in a little while. Use your skew chisel to smooth the surface as much as you can and then use your parting tool to partially part off the box from the waste wood but don't separate them yet:
Ok, time to hollow out the box. I always use a drill bit to establish the depth of the things I turn. Here in this photograph you see a drill chuck with a forstner bit in place. This is a special chuck designed for a lathe and it has a #2 morris taper (you should know the taper of your lathe-it will say this in the instruction booklet that came with it). It's a very handing tool to have and I use mine a lot. A wider forstner bit would also hollow out the box for you and those can be really handy to have as well:

This is a depth gauge. I'm going to use it to establish the exact depth of the hole which should be 2" deep:

And here is the hole after I've finished drilling. It's the required 2" and I'll stop turning when I reach the bottom of this hole so I don't accidently cut through the bottom of the box (I've done this and it's aggravating):

I used a narrow gouge to hollow the box. Make sure your gouges are very sharp and just gently shave away at the surface of the box. Using a wide gouge or a dull gouge will cause a catch and that in turn will pull the box out of the chuck jaws:

Now just gently begin to cut away the inside of the box. This should be a very gentle activity at this point. Keep dishing out the box and move from the outside toward the inside of the box with your cuts. This will help prevent the box from coming out of the jaws of the chuck:

Here I've really dished out the center:

Keep cutting deeper and deeper. Here you can see a flat section inside the box. I'm going to remove that and cut all the way down to the bottom of the hole. After that I'll thin out the sides:

Here is the box several minutes later. The bottom is flat and the sides are nearly uniform in thickness. Next I'll clean up the top of the box with a narrow gouge and the skew:

This is the finished box. I've sanded it with 150 grit sandpaper. That's all it needed"

Here is the box section off the lathe. I've left the waste section in place for now:

Time to make the lid. I've placed the lid section in the chuck and I've turned a tenon to fit inside of the box. The inside diameter of the box is 52mm and I've also made the tenon with sloping slides to fit inside of the walls of the box, which also slope. I've I had made the box with the sides parallel to each other, I would have made this tenon with parallel sides as well:

Since the top and the bottom of the lid both have to be turned, there comes the problem of how to attach it to the chuck. For this I'm going to turn a mortise inside of the tenon to accommodate the jaws of the chuck:


Here is the lid. I've flipped it over and inserted the jaws of the chuck into the recess on the lid. I'm going to remove a lot of wood now and just leave enough to create a knob and the lid:

Here you can see the lid spinning on the lathe:

Here is the lid and the knob. Notice the chipping along the edges of the lid and the knob. Red oak is a coarse wood and not the ideal turning wood and it's not good for holding fine detail. I'm going to deal with this momentarily:


Here is the final shape of the lid. I'm going to sand it smooth and deal with the chipped edges with sand paper. Ordinarily I'd use a tool but I'm afraid of really knocking off a large chip so I'll just sand the edges instead:

Here is the lid on the box. Time to finish the project:

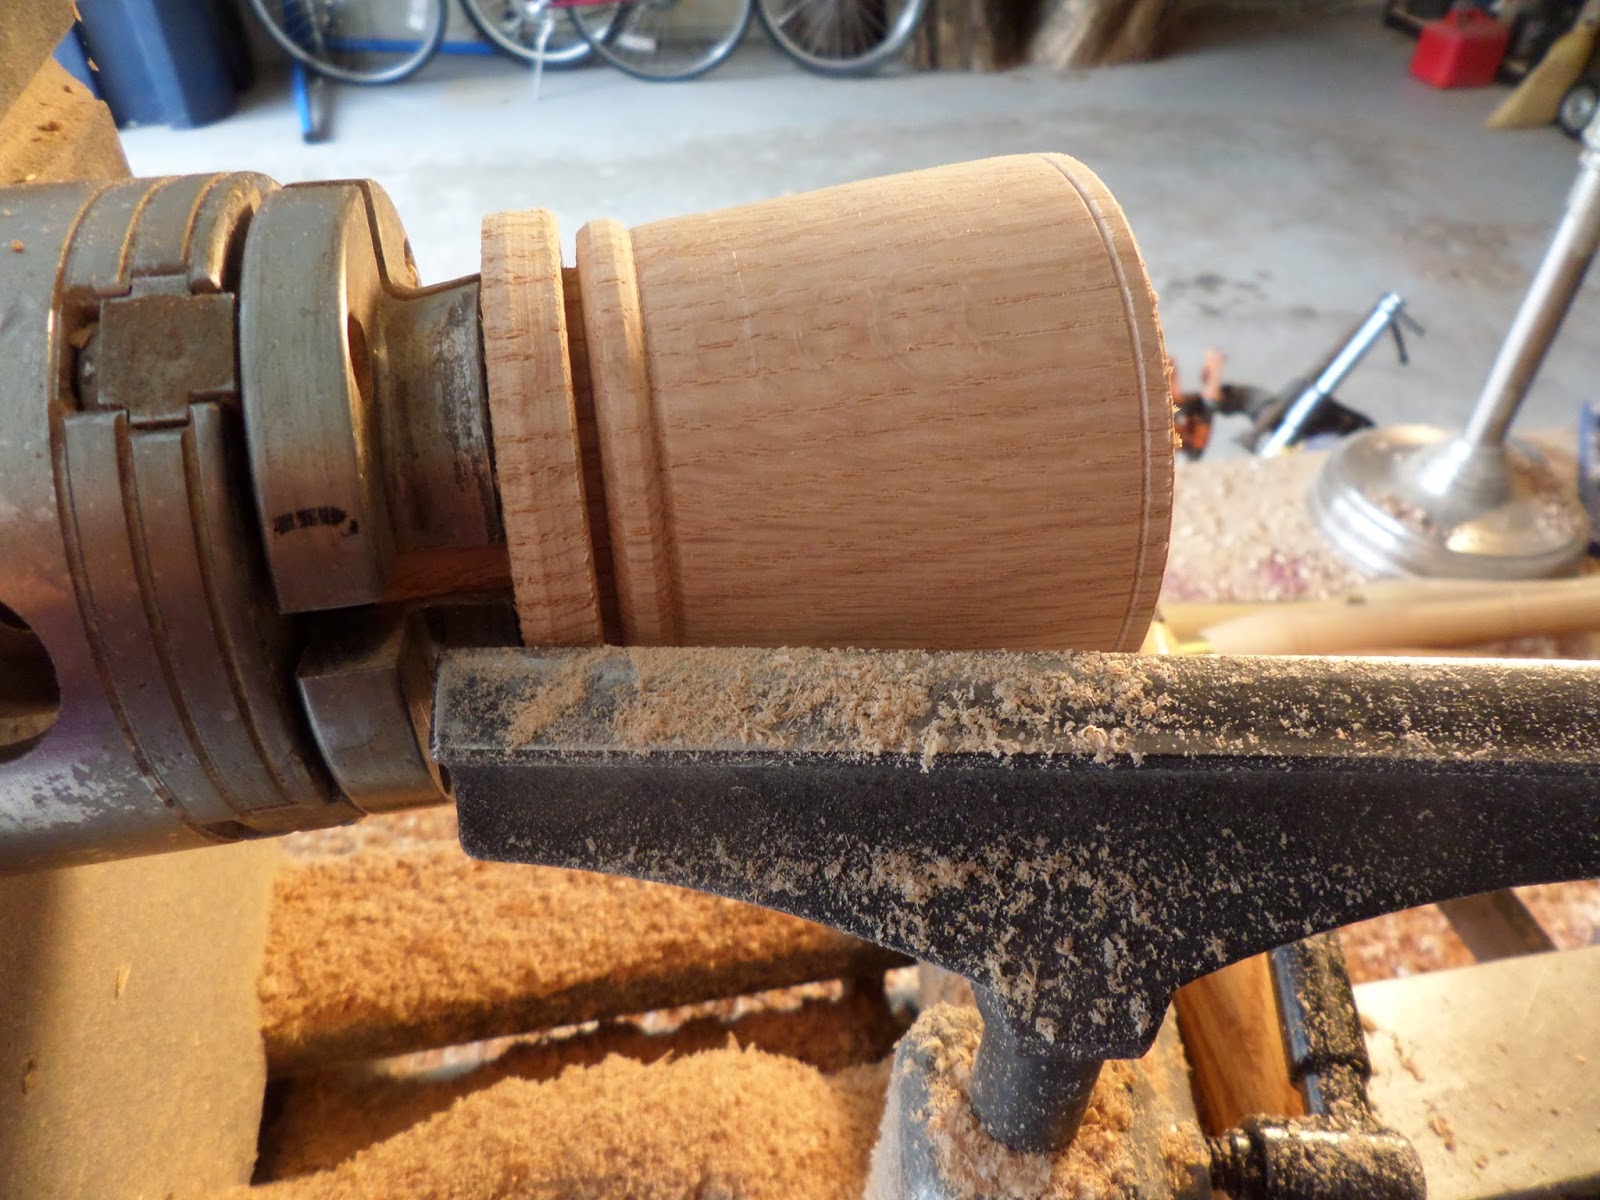
This is the box on the lathe. The chuck jaws fit perfectly inside of the box. I've sawed off the waste wood and now all that is left is to flatten and smooth the bottom of the box:

And here is the finished bottom. Make sure that the bottom is perfectly flat or it will spin on a flat surface:

And here is the finished box with the lid in place:

The inside of the box and lid:

The underside of the box:

And next to an apple for comparison:

I haven't applied a finish yet as I got hungry and went inside for a meal. By the time I finished it was getting dark and cool. I'll probably apply some salad bowl varnish to it tomorrow and show you all a photo then. You could do anything to this box for a finish-oil, paint, anything. The box could also have been embellished with beads or lines or any number of other methods for decoration. It's entirely up to you.
Well, I hope you enjoyed this and if you do make a project for Mother's day, either this project or any other lathe project, send me a photo. I'd like to see it.
And as for my Mother's Day, I plan to do absolutely nothing that day!
See you soon,
VW


