Hi Everyone,
Everyone should read this article that appeared in the NY Times today:
http://www.nytimes.com/2012/01/31/us/for-soldier-disfigured-in-afghanistan-a-way-to-return-to-the-world.html?pagewanted=1&_r=1&adxnnlx=1328036424-Ao6kYkyXBRJ5NXdbC0e/6Q
VW
Tuesday, January 31, 2012
Monday, January 30, 2012
Mineral Stained Poplar Salad Bowl
Good Evening Everyone,
Well, I finally got that mineral stained poplar bowl blank cut to shape and mounted on the lathe between centers. This bowl blank is very heavy because it's full of water and also because it's large. Here's a photo of it before I began to cut this:

This is the largest bowl I've ever made. It's about 5" thick and 10" thick.
I began cutting it and it cut just perfectly. I managed to get it balanced and I began cutting it with my 3/4" bowl gouge just to rough it into shape and to get a lot of of wood removed.
This is the blank after about 10 minutes of cutting:


Well, I finally got that mineral stained poplar bowl blank cut to shape and mounted on the lathe between centers. This bowl blank is very heavy because it's full of water and also because it's large. Here's a photo of it before I began to cut this:

I began cutting it and it cut just perfectly. I managed to get it balanced and I began cutting it with my 3/4" bowl gouge just to rough it into shape and to get a lot of of wood removed.
This is the blank after about 10 minutes of cutting:

The wood is cutting so well--the wood working angels must be hanging around the wood shop. The wood is damp to the touch but there is no sap to speak of.
Here is the blank after about 30 minutes of cutting. You know some women like to hang around the mall, and some like to do lunch, but some of us like to hang around lumberyards and make things. You always want to be friends with that last group!!

Here you can see the wood shavings. It looks like some one shredded a giant block of mozarella cheese in the wood shop! This is producing a ton of shavings. If anyone wants them let me know.

Here are the last two photos for the evening. You can see the foot on the bottom and the mineral staining is spectacular. There is no tear out and the wood is cutting perfectly.


I've covered the blank with a plastic trash bag and left it on the lathe to keep it from drying out. Tomorrow I'll finish trimming the foot and smooth the outside of the bowl.
See you tomorrow,
VW
Prototypes
Hi Everyone,
I like to try new things from time to time and in order to spot and work out problems ahead of time I like to make prototypes and give them to friends who like to cook. This gives me a chance to work out design and production problems before I jump into making things out of more expensive materials. And by giving them to friends to test, I can see if my designs work out in a busy kitchen environment.
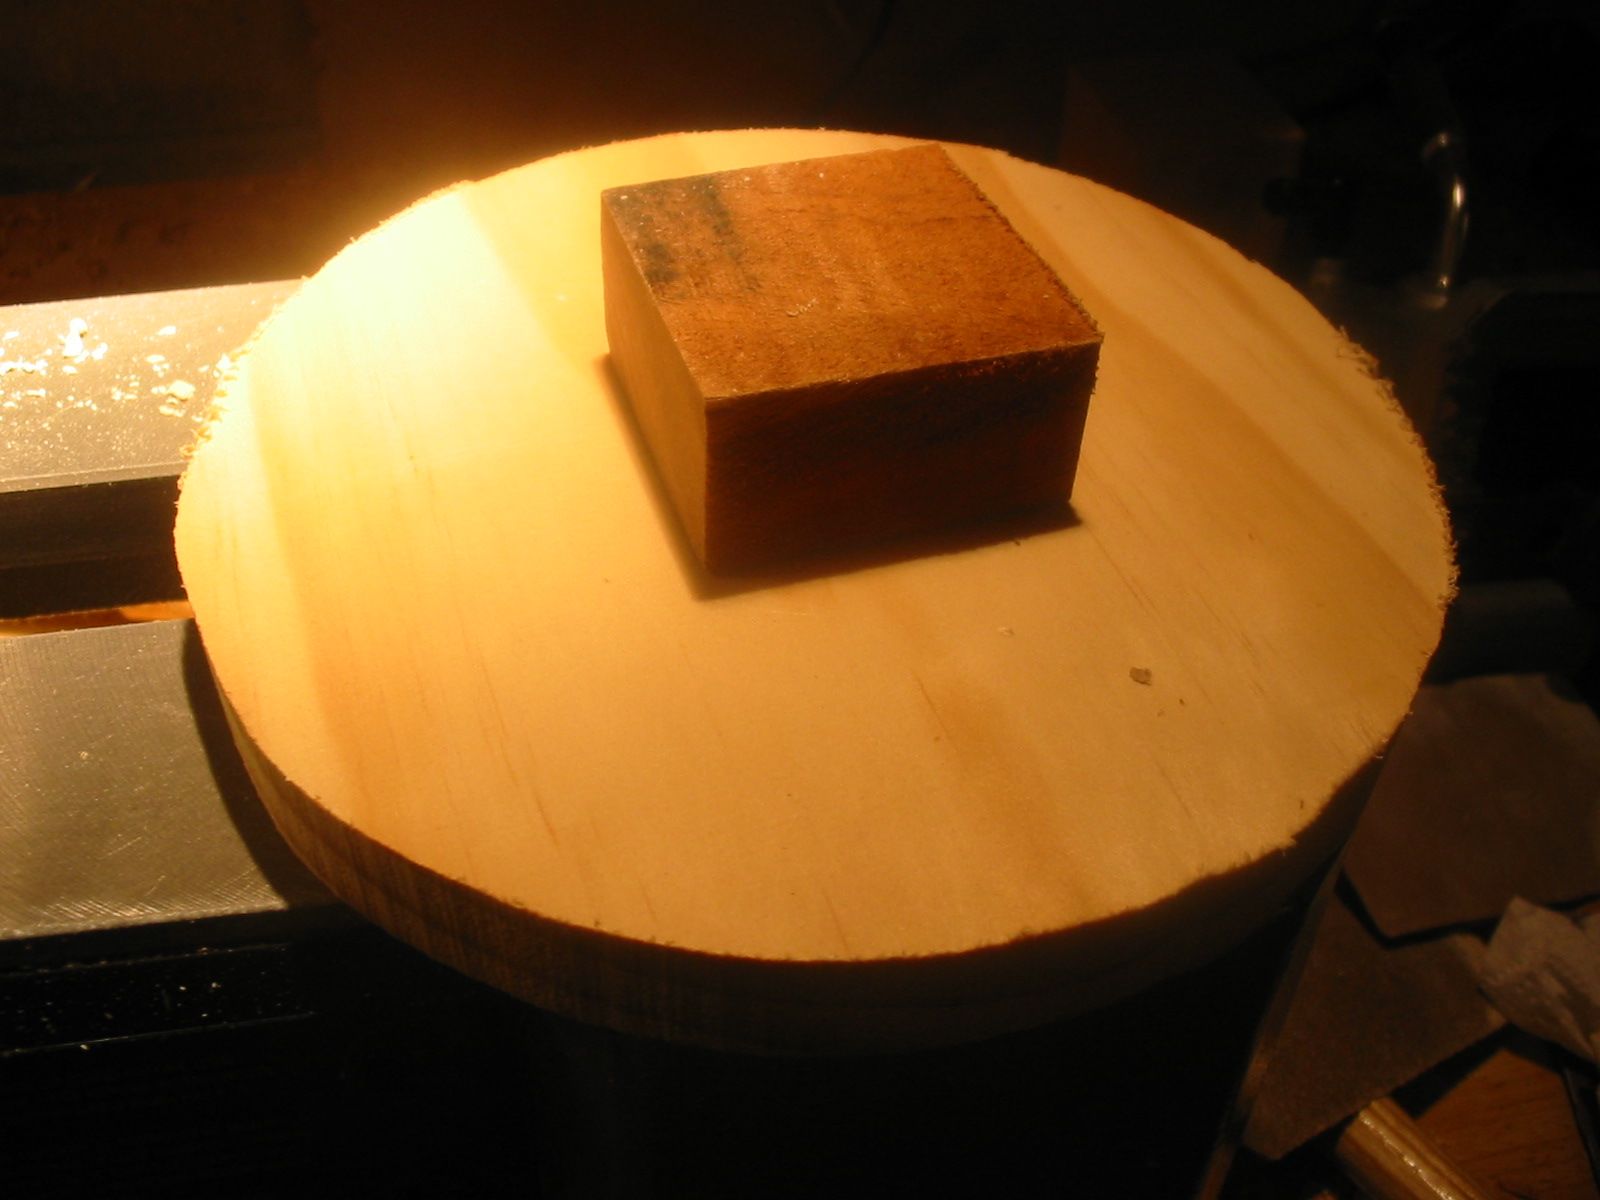
I've been wanting to make both small tea boxes and salt cellars and since I had some thick pine left over from a previous project I decided to use a pine blank and make a salt cellar.
Salt cellars have been around probably as long as there has been salt. They are open containers, not salt shakers per se, and they allow the cook to grab a pinch of salt so the container has to be wide enough to admit an adult hand and shallow enough so that a person doesn't have to dig around trying to get every last grain of salt.
So I've cut out an approximately 5 1/2" blank and mounted it on the lathe and began turning it to a round shape:
 You can see that I've cut a tenon and a foot. I like to cut foots on bowls because it gives a nice transition between the table surface and the bowl. The tenon is the attachment point for the lathe.
Since pine is a very soft wood it only took about 10 minutes to completely cut and finish the outside. I then flipped it over and hollowed out the inside. I've purposefully left it rather shallow so grabbing the last couple of grains of salt isn't so difficult:


I rounded off the knob just to get the corners off of the block. After that I took the lid off of the bottom and turned it on the faceplate in order to fully shape the knob. Here is a photo of the completed lid on the bottom of the box:


Here is the underside of the lid:


I like to try new things from time to time and in order to spot and work out problems ahead of time I like to make prototypes and give them to friends who like to cook. This gives me a chance to work out design and production problems before I jump into making things out of more expensive materials. And by giving them to friends to test, I can see if my designs work out in a busy kitchen environment.
I've been wanting to make both small tea boxes and salt cellars and since I had some thick pine left over from a previous project I decided to use a pine blank and make a salt cellar.
Salt cellars have been around probably as long as there has been salt. They are open containers, not salt shakers per se, and they allow the cook to grab a pinch of salt so the container has to be wide enough to admit an adult hand and shallow enough so that a person doesn't have to dig around trying to get every last grain of salt.
So I've cut out an approximately 5 1/2" blank and mounted it on the lathe and began turning it to a round shape:

Since pine is a very soft wood it only took about 10 minutes to completely cut and finish the outside. I then flipped it over and hollowed out the inside. I've purposefully left it rather shallow so grabbing the last couple of grains of salt isn't so difficult:

This is also an interesting piece of wood in that it has a lot of pitch in it. If you look at the rim you can see an area that is really soaked with pitch (and the wood shop smells great at the moment). This is typical of pine and a reason why you don't want to burn this in a fireplace.
Since our salt cellar will be probably sitting on a counter were it could get splashed with water, it will need a lid to keep the salt inside dry. So I'm fashioning a lid out of another piece of pine and Brazilian cherry. Since it is so very cold in the wood shop at the moment and glue won't dry under those conditions, I'm going to use a wood screw to screw on the block of wood that is going to become the knob. I also am planning on turning the knob into a finial-type shape and I'm worried that the narrowness of the base could cause it to break off at some future point so I think a wood screw works well. But I suspect that it will ruin the esthetics of the piece. Oh well, we can't have everything.

This photo shows the lid mounted on the lathe and the sides and underside shaped. The lid needs to be able to be removed with one hand so it can't be a tight fit but it can't be so loose that it wobbels so it has to be shaped and cut one bit at a time till this fit is achieved. I don't like the way the screw looks...

I got the top and bottom to fit and I've fitted them together and I'm going to turn them as a single piece so the diameters of both will be identical:


And here is the completed box.
I rounded off the knob just to get the corners off of the block. After that I took the lid off of the bottom and turned it on the faceplate in order to fully shape the knob. Here is a photo of the completed lid on the bottom of the box:


Here is the underside of the lid:

That screw has got to go.
This is the inside of the bowl:

Since this piece of wood has so much pitch in it, I've put an oil and beeswax finish on it as I don't think other finishes will work well here.
Discussion:
Well, I normally like the items I make but I'm not too sure of this one. The knob is too stubby for a finial and I'm not sure I like the difference in color. And that metal screw has got to go. No more screws. I'll go back to doweling the knobs on like I have in the past. Oh well, that's what prototypes are for. They answer questions and help me to make better decisions next time around.
I have a young friend who likes to use coarse sea salt when she cooks so I'll ask her to use this for a while and see how it works.
The wood shop is absolutely freezing right now so I'm going to stop and come back later today after I've warmed up a bit. I'm going to shape the tea boxes I've told you about and get those on the road. And the wedding present is on hold. It's too big for my lathe and I'm going to have to figure out how to cut it without cutting it too narrow.
So let's get some hot coffee and I'll see you later in the wood shop. Stay warm!!
VW
Saturday, January 28, 2012
Wedding present, continued: discussion and plans
Good Evening All,
Well, we've been able to saw off the corners of that block of mineral-stained poplar so I'm going to go ahead and turn it into a salad bowl. Here's photo of the block:

Here is a photo of the cut surfaces of two of the corners:

Well, we've been able to saw off the corners of that block of mineral-stained poplar so I'm going to go ahead and turn it into a salad bowl. Here's photo of the block:

Here is a photo of the cut surfaces of two of the corners:

You can see the streaks in the wood on the left. Actually this block has all sorts of colors, even pink and red. The wood itself is very damp and poplar is not the hardest of woods so it's going to be a challenge to cut it and not tear out the end grain or shred the wood fibers.
I'm going to attach the large 6" faceplate with some long, heavy wood screws and turn it between centers for a while. The block is heavy and I'll have to lighten it up by removing as much wood as possible before mounting it on the faceplate alone. Otherwise, it can damage my lathe.
So we have our hands full this time. Will I be able to turn it into a salad bowl or will it turn into a bird feeder? Stay tuned!
VW
Friday, January 27, 2012
Selkie Wood Works is open for 2012 and first big project
Hi Everyone,
Well, it's a very snowy, cold day today and since I've got my new bench tools on my new work table it's time to go down to the wood shop and make something.
I've mentioned in a previous post that a young friend of mine is getting married this spring. Her father is very ill and they understandably wanted to get married so her father could be apart of this.
I decided to make her a fruit bowl out of mineral stained poplar but the wood blank is too large for me to rough cut into shape. Since time is of the essence, I decided to make her a bowl out of a hickory blank from a tree that came down in a storm. The wood blank is unseasoned wood and so we're going to have to cut it out and then dry it out before finishing it. Since it takes time for wooden bowls and plates that begin as unseasoned wood to dry out and for the whole process to be completed, I'm going to have to work quickly.
I've mounted the bowl blank on the lathe and begun cutting the exterior surface of the bowl:

Most woods have a scent of some sort and unseasoned wood tends to have a very sweet scent and this blank is no exception. The wood shop has a very sweet odor at the moment and if this were spring or summer time, my shop would be full of bees.
Here we are after about 45 minutes of cutting and shaping:

I've got the basic shape and the foot cut out. This blank is turning very nicely with no torn fibers and for wood that is full of water, it is finishing very smoothly too. Very nice.
I've flipped over the bowl blank and begun hollowing it out. You can see the large pile of wood shavings in from of the bowl. By the time I finish this turning today, I'll have enough shavings to fill a large pillow.

Check out the following photos:


I've left the bottom and the sides of the bowl thick and unfinished. The bowl will now go into the drying bag downstairs for the next 3-4 weeks. Hopefully it will dry out with a minimum of distortion to the sides and rim. We'll check back in three weeks and see how it looks. Keep your fingers crossed.
My next project: two tea boxes for a friend and her daughter who lost her husband last year.
As it's cold and my joints are beginning to hurt, it's time to quit and go get some hot coffee. See you tomorrow.
VW
Sunday, January 22, 2012
Work Table, finished
Hi Everyone,
Well I finished the table and it came out great. Here are the photos:
First I made the frame. I attached the brackets to the legs and screwed all of them down:

These particular brackets utilize self tapping screws which means that you don't have to pre-drill the holes that the screws go into. A huge time and hand saver. So I got my cordless drill out and started drilling away:

Here is one completed leg with the upper and lower bracket in place. I made four of these:

Here is a side shot of one of the brackets. They form a box and the legs and the railings slip inside and are screwed in place. This results in a very strong frame:

The next step involves attaching the side rails to the legs. Here you see that I've clamped everything together so it doesn't move while I'm drilling and I've also checked to see that the inside angles and the outside angles are all 90 degrees or in other words, the table frame is square:


I assembled both ends of the table and then I attached and screwed on the long rails. And again, the whole thing is clamped together:

Here is a photo of the completed frame:

Now we're on the home stretch. The bottom shelf goes on first. The corners have to be notched to accommodate the legs and I used my trusty sabre saw for that:

It fits! Yes!!!

Lastly, I put on the top and screwed it down. Voila! Houston, we have lift off! This is the finished work table. It's heavy and strong and it should hold up well in the work shop.

Between the cold and some arthritis, I am in considerable pain at the moment so I'm going to give my hands a rest and stop typing.
Next week, after I've recovered, we're going to begin work on the salad bowl out of poplar. As my friend doesn't read this blog and isn't on Facebook, she won't know that I'm making this and it can be a big surprise on her wedding day. I love surprises.
So I'm going to go and get something hot to drink and let my joints recover. Thanks for dropping by the wood shop and I'll see you soon.
VW
Saturday, January 21, 2012
Work table and other plans
Hi Everyone,
Well, I need a work table and I've begun working on one today. Here we go:
I got a bench-top sander over the holidays and I'm really excited to begin using it (no more hand sanding-yea!). And I also have a bench grinder to sharpen my tools with. These two tools together are very heavy and I need a strong table so I can bolt them down and use them. So after some serious thought and a cup of coffee I decided to make a table using construction braces.
There is a company called Simpson Strong Tie and they make a whole array of different types of construction connectors: http://www.strongtie.com/. They also have produced several diy-type projects using these connectors and one of these projects is a heavy-duty table. You can see the plans for this at: http://www.strongtie.com/ftp/fliers/DIY-PROJECT08.pdf.
So, I went and I bought some connectors and some 2x4s and began cutting and planning:

I cut 4 legs that are 33 1/4" long, 4 rails that are 45" long, and 4 rails that are 16 3/4" long.
I also purchased some self-tapping screws:

And I purchased 4 connectors:

I should have purchased 8 connectors ( but I made a mistake. I'll have to go and get the other 4 connectors tomorrow). You can see that the connectors are pre-drilled so you can easily screw them down to the 2x4s.
As it's beginning to get really cold in the wood shop, I'm going to stop there and work on this tomorrow when it's forecast to get up to 30 degrees-it's about 10 degrees right now.
____________
As soon as I get this table made, I'll set up the rest of my equipment and begin working again on all sorts of different stuff. I have a young friend who is getting married later this spring and I'm going to make her a wedding present. I bought a large block of mineral-stained poplar and I'm going to shape it into a salad bowl. As the wood is unseasoned and she's getting married in a couple of months, I'm going to make this my first project of the year so the bowl will have time to dry out. This should be a really pretty bowl.
So grab some coffee and fire up the computer and drop by the wood shop. We have more adventures ahead and I think it's going to be a good year for Selkie Wood Works.
See you tomorrow.
VW
Getting ready to re-open the wood shop
Hi Everyone,
Well, we're nine days away from February 1 and it's time to get ready to re-open.
I need an additional work table so I'm going to be going down to the wood shop to make one. I'll be posting some photos later this evening.
We're on our way!
VW
Well, we're nine days away from February 1 and it's time to get ready to re-open.
I need an additional work table so I'm going to be going down to the wood shop to make one. I'll be posting some photos later this evening.
We're on our way!
VW
Subscribe to:
Comments (Atom)