Thursday, April 13, 2017

Hand carving wood on the lathe-discussion and plans

Hi Everyone,

Here is a project I've been thinking of doing for a while-doing some hand carving on the lathe.

Using a lathe for carving or painting or other non-turning types of work isn't new-many turners use the lathe to steady pieces of work while they apply some sort of surface adornment to their work. I'm going to use the lathe today to shape a carving blank for a small 3-D statue.

Discussion and Plans

I'm going to use a section of a red maple tree branch as a turning blank and turn it into a carving plank for a small statue called a jizo and here is a photo of what they look like:


In this photo you can see that the figure is basically a very simple one-it consists of a head section and a body section with some simple detail carved into the surface.

I'm going to use the lathe to accomplish two things-first, to turn the tree branch down into the basic head-body shape and second to use the lathe as a vice to hold the blank steady while I carve the surface.

Here are some photos of today's turning:

This is a photo of the branch that I plan to use. It's red maple, which is quite a common tree where I live, and it's one of my favorite turning woods. It holds detail well and I also like the color of the wood as it looks very nice with food on it. It also is carveable unlike harder species of maple:


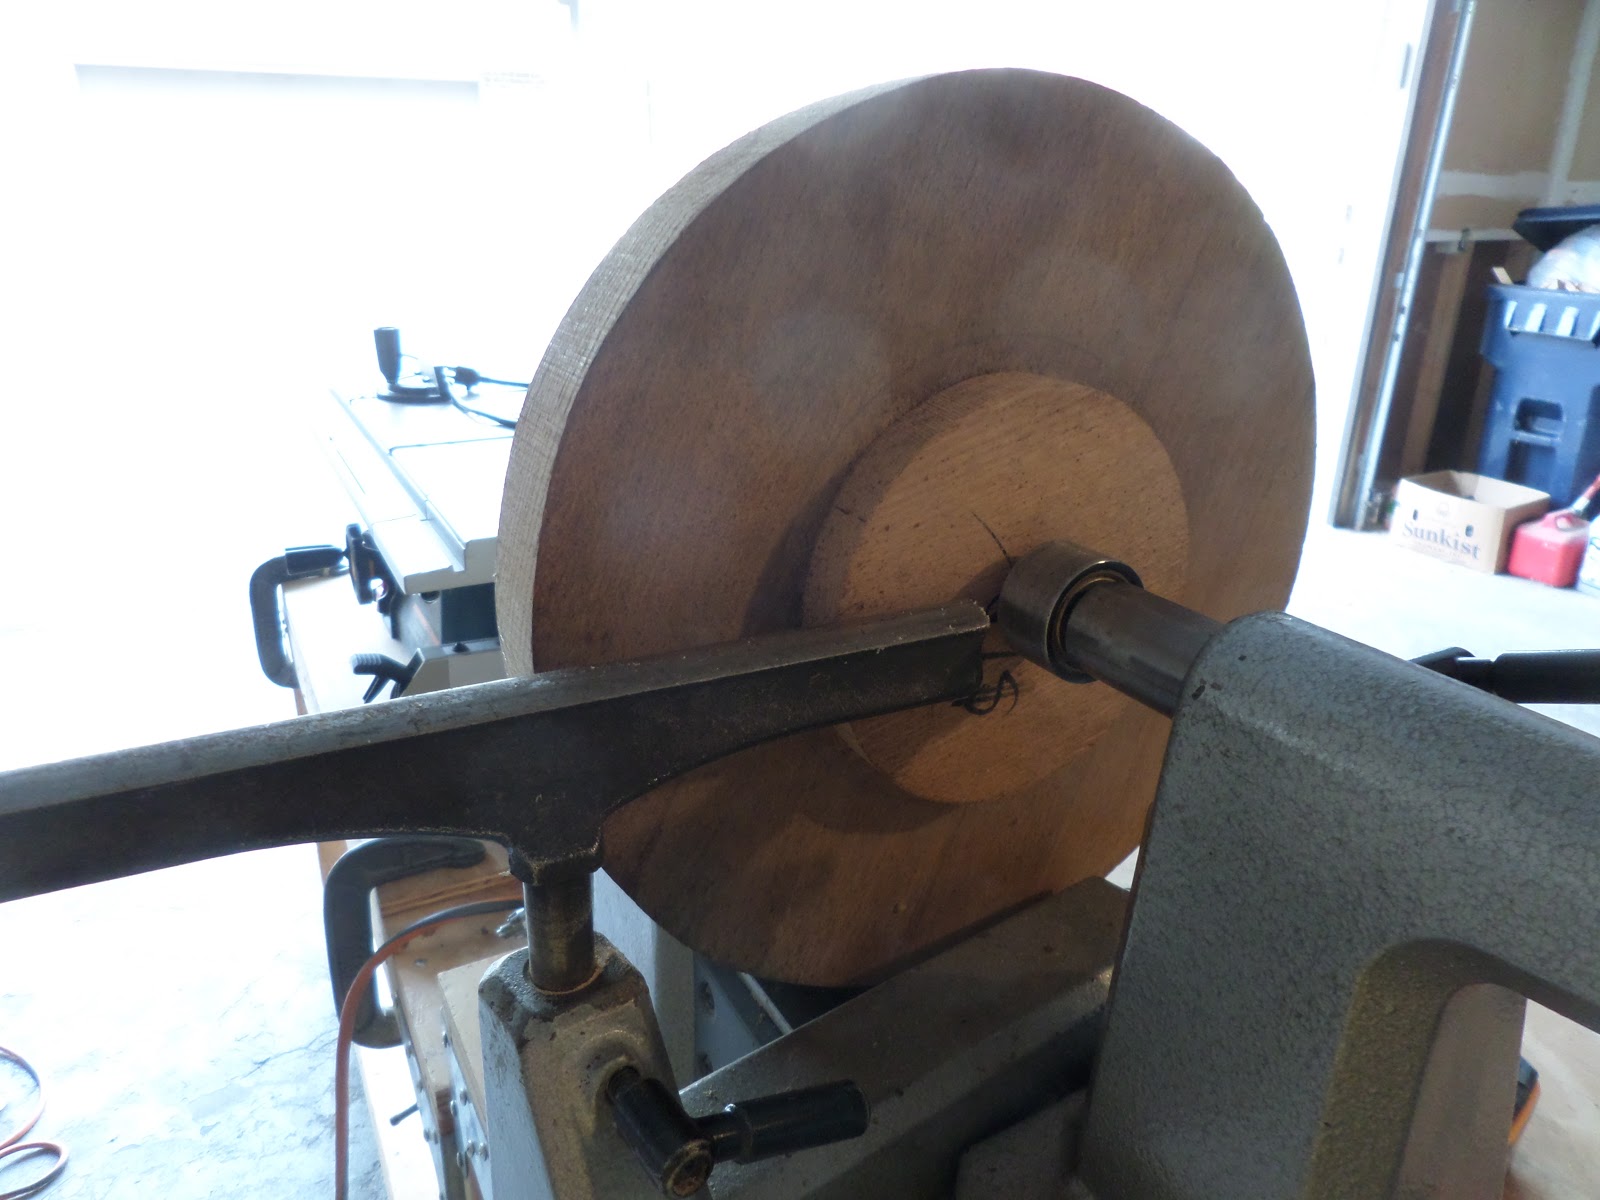
I'm going to place it between centers on the lathe:


Then I began to turn it down to a cylinder. In the photo you can see a crack in the wood that I will avoid when I mark out the section that I intend to create for the statue:


 Here is the cylinder that I've turned and marked out:


Here I've marked off the sections for the head and body:


And I began to shape the body first as this is the simpler of the two forms:


In the next several photographs you can see the carving blank slowly taking shape. The head portion was the more difficult of the two shapes to form. It needed to be sized to be in proper proportion to the body (see the jizo photo above) and that took a lot of careful shaving the surface with a skew chisel:


After about 30 minutes of cutting this is the shape I've settled on. You can see that it's still attached to the lathe via the waste wood on the ends. When I'm completely finished carving the statue, I'll turn the lathe back on and turn off the waste ends. Hopefully I won't screw this up:


Now that I'm finished turning the blank, I've locked the lathe in place and drawn on some features with a pencil. I'm going to leave the tool rest in place and use it to rest my hand on while I'm cutting the surface:


And there we have it. I'll do a little carving and show you some photos with my next posting.
Stay tuned,
VW

Tuesday, April 11, 2017

Staining Wood-The Fruit Platter Project

Hi Everyone,

Well, I gave the fruit platter a 3rd coat of paint and unfortunately it just doesn't look terribly great at this point and I don't think putting on additional coats of paint is going to change that:


So I've taken the platter off of the lathe for now and I'll store it away and perhaps re-visit it at a future point in time.

I still have the other oak turning plank and I'll turn that also into a platter but leave it unpainted.

Oh well you can't win them all.

I'm currently working on some shelving and I'll show you the result when I'm finished. I also need to rent a chain saw and cut up some of the logs I have so I can get them ready for turning and I'll post that in the coming weeks.

Stay tuned,
VW

Friday, April 7, 2017

Staining Wood-The Fruit platter project continued

Hi Again,

Well, here is the platter at the moment:


It has two coats of yellow and white paint on it. The surface isn't very smooth-I think using an open grained wood like red oak for this was ill considered. And it's difficult to get a razor smooth line between the white and yellow sections. I still have to put a purple line on it and I'm not sure how I'm going to do that yet. So there is still a ways to go with this.

I have to go and get some wood and some paint brushes later today and I'll head to an art store to see if I can find a narrow paint brush that I can apply the purple section with.

Stay tuned,
VW

Thursday, April 6, 2017

Staining Wood-the fruit platter-color

Hi Everyone,

Well, I've been thinking about what to do with the platter and I decided against staining it to an English oak color. The platter is made out of red oak and not white oak and so that color of stain(s) on the surface is going to probably look a little odd. And I don't just want to stain wood and make it browner so I set that idea aside.

That left me with a red oak platter with no surface detail other than the laminated oak strips that it was made out of. Now, if I'm ever to get past just turning wooden bowls and finishing them with varnish then I'm going to have to take a radical turn and start experimenting. So I spent a good deal of time yesterday looking at several books here at home that featured shelving and interior decorating and I spied a photo that had several old fashioned crockery bowls sitting on a shelf. I also thought back to this past winter when I began knitting again.

I used a lot of color in the items I made and I made all sorts of stuff that we had been needing here at home, especially some dish rags I knitted:


I used all sorts of colors to liven up a common kitchen item and it occurred to me that I could and should try this idea with the platter. So I picked up the platter and put it back on the lathe and worked on it.

Here we go:

I wanted to add several colors to the surface of the bowl-a main color with two secondary colors and I wanted to place the secondary colors on the top surface of the platter so it could be seen. I could just paint some round lines on the surface and be done with it but in looking at the surface it seemed to me that it needed some surface detail to help highlight the colors and define the areas where they will be placed so I turned some very flat beads and between the beads I added a narrow fluted area:


I also went and bought several small jars of paint samples-yellow as the main color, and a soft white and deep purple as the secondary colors:


And I applied the yellow to the underside and the top of the platter:


And I applied the white to the fluted area as a base coat (next time I'll use the white paint as a base coat-primer before I apply any colors):


Now I'm going to let this dry and then apply one or two more coats to get a good, deep yellow and white and a smoother paintable surface. I'll do that later today and do another posting to show you how it's going.
Stay tuned,
VW

Tuesday, April 4, 2017

Staining Wood-the fruit platter project continued-hollowing out the platter and falling over

Hello Again,

Well, I finished lunch, or should I say the cats helped me finish lunch, and I went down to the wood shop and hollowed out the platter. Here are the photos:

Picking up where I left off-here is the platter blank on the lathe. I've flattened the face of the blank-not the screw holes from the face plate. I'm going to try to turn the platter to about 3/8" thickness and keep the inside and outside surfaces parallel to one another:


I've created a narrow, simple rim and you can see from the photo that I've dropped the outer edge of it just a little below the top of the platter:


Ok, now to hollow it out. I put down the camera and completely hollowed it out which took about 25 minutes to do:


As I got nearer to that 3/8" thickness, I switched from a roughing gouge to a large, heavy bowl scraper. This is one of my favorite tools:


And here it is, scrapped and sanded and ready to be sealed:


 Here it is at present. I took the platter with the Nova chuck attached off the lathe and placed a couple of rocks inside so you can see the depth a little better. I was just congratulating myself when I miss stepped and fell off of the stairs that the platter is sitting on:


Ok, now while I'm nursing a sore wrist, I'll do some research about the stain color and come back and work on this some more. I'll apply both the stain and the varnish to the platter while it's all still on the lathe.

Having a painful afternoon,
VW

Staining Wood - Experimenting with a turned wooden fruit platter-discussion, plans, and photos

Hi Everyone,

Well, it's a nice day outside so it's time to get started on the first project for the year-turning a wooden fruit platter and instead of leaving it it's own natural color, I'm going to experiment a little and stain it. This will be the first of a two part posting today.

In the past whenever I've turned something I've left the natural color of the wood alone-I've only stained a turned object once and that turned out to be one of the great disasters of my life. Never did that again. But I've seen the work of other turners who do color their work with stains or paint and I've had a change of heart and decided to try it again.

I've been experimenting a bit by combining different colors of stains to extend the range of colors that manufacturers offer. I use Minwax products quite a bit and I've had some very interesting and lovely results staining some housewares I've made recently so I've decided to try this out on some of my bowls and platters.

I went and bought some spoon carving wood at Forrest Products Supply, one of my favorite wood sources here in the Twin Cities area and while I was there I spotted a couple of glued up turning blanks out of white oak that had been tossed aside. I purchased those and I've taken one of them and put it on the lathe and partially turned it for this first posting. I would like to stain it an English oak color and get the color as close to that traditional color as possible.

Plans
I'm going to turn a simple shallow fruit platter out of one of these blanks and stain it. It will probably be about 11 inches or so in diameter and about 1 inch deep. I'll turn the platter first and you can look over my shoulder now and see how that works out.

Here's the photos for this posting:

Here is the turning blank I'm going to use. It's about 12 inches in diameter and 1 1/2 inches thick and it has separate oak foot that someone glued underneath it:


 Here is the blank on the lathe. I've attached a 6" face plate to it and mounted it. I like using face plates as they do a good job of securing the blank to the lathe and the weight of the plate helps dampen any vibration while I'm truing up the rim and face of the blank. You can also see the foot that is glued on:

 This is a shot of the face plate:

The first thing I did was true up the edge of the blank. It had not been cur in a true circle so it took a few minutes to cut it down. Here you can see where I've removed some of the rim wood and an area where it still needs to be turned:

This is the edge after it's been entirely trued:


With the rim finished it was time to turn my attention to what will be the underside of the platter. The first thing I did was to flatten the area between the edge of the platter and the edge of the foot:

Then I created a long, sweeping curve between the uppermost edge of the blank and the edge of the foot. You can see these two points by looking at the arrows in the photo:


When I finished that, I turned my attention to the foot. You can see that the foot is not centered and is also was not cut into a circle so the first thing I did was cut it down and flatten the face of it:


 Next, I continued shaping the underside of the platter. It pays to periodically stop the lathe and look at the platter from the side to see just how the curve is progressing and how much more wood to remove:

In this photo I've finished creating the curve I want but there still are a couple of high spots on the surface. I took a sharp skew chisel and gently removed these areas:


Ok, the curve is finished.
The foot of any turned piece is important-it is point of contact for the platter and any flat surface it will be placed on so it has to be perfectly flat so it doesn't rock. It is also the attachment point between the body of the platter and the lathe.
I could screw the face plate back on but that will involve drilling holes into for the screws and the foot isn't really thick enough to prevent the holes from penetrating the platter and becoming a problem when turning the floor of the platter. So I'm going to drill a large hole into it and use my Nova chuck to attach the platter to the lathe:


This is a photo of the chuck. I've used it many many times in the past. Also in the photograph is a 2 1/4" forstner bit which is what I'll use to drill with:

This photo shows me drilling the hole for the chuck:


Drilling straight into the foot produces a hole with straight sides. As the jaws of the chuck are dove-tailed it's important to dove tail the sides of the hole so the jaws will sit securely inside. And this is the tool that is used to produce this. Very handy to have around:


And here is the underside of the platter. I've sanded it smooth to 320 grit sandpaper:


In this photo I've taken the face plate off and mounted it on the lathe with the chuck. And as this is going to be stained I used a stain sealer on it. It has a nice color:


This is the top of the platter waiting to be hollowed out. I'm going to stop and have some lunch and then come back to the shop for more turning:


Stay tuned,
VW

Monday, April 3, 2017

The Wood Shop is Open - Here We Go Again

Hi Everyone,

Well the wood shop is back together again and I'm beginning my 6th year of the blog. This year I'm going to be doing more turning than last year and concentrating on smaller diameter bowls, spoon carving, and household goods.


The cats are also ready to go and will be consulting on various projects and occasionally making me look like an idiot, which isn't always that difficult to do.


So welcome back, grab some coffee and put your feet up. We're on for another year of wood working adventures!

Best and stay tuned,
VW