Today we're going to begin a bowl out of black walnut and this bowl is going to be a gift to a very special friend of mine and here's the story about my friend Holly and this particular piece of wood:
I have a wonderful friend named Holly who lives out on a farm with her family and a whole bunch of very friendly chickens in Afton, Minnesota. Several years ago during a strong wind and rain storm a large black walnut tree that was growing on her property, roots gave way and the tree came down. Knowing that I turn wood, Holly told me about the tree and offered to give me the trunk from the tree and so my youngest son and I went out to Afton to get it. As it came down in a rainstorm it was full of water and so it was very, very heavy. I cut the trunk into sections and then split one of the sections in half and made bowl blanks out of them. I tried turning a bowl from one of the blanks but it was just too wet for turning and so I treated the cut ends with Anchorseal and stacked them away.
Fast forward almost 2 years-the blanks are much, much lighter in weight, signifying that the wood is much dryer and ready to turn. I took a portion of one of the blanks and made a small flower vase several weeks ago (and you can see this on the blog). The wood was dry and the vase came out absolutely beautifully. Time to make Holly's bowl and take it to her and the chickens.
Discussion and Plans
I am going to do this project in slow, easy stages as I think this is a good way to illustrate this project. So my first posting today will be about getting the blank ready to be mounted on the lathe and I'm also going to show the blank mounted on the lathe at the end of this posting. Subsequent posts will show how the blank is shaped and hollowed out and lastly how it will be finished.
Here we go:
Here is a photo of the bowl blank. It's a big thing, about 6 /12 inches at it's deepest and about 9 inches wide and 11 inches long. In order to turn this on my lathe, it's going to have to be cut down considerably. So the first thing I did was to find the center of the flat side of the blank. This will eventually be the top of the bowl and since the blank is deep and thick, I can screw down a large faceplate and use long heavy wood screws to do that with:

This photo shows the blank with the center marked out:

In this photo is the blank, the faceplate I'm going to use, which is 6 inches in diameter, a center finder so I can get the faceplate reasonably centered on the blank, and some long wood screws:

In this photo you can see how large and square this blank is. As this blank is too large to turn on my lathe, it will have to be cut down. I'm going to cut off the corners and trim it some and I can do this one of two ways- I can eye-ball it or I can use a small plywood template (see below) and use that while I'm sawing it with the bandsaw. You can also hand saw this with a carpenter's handsaw:


Here's the blank after I've sawed off the corners and some of the excess wood. Note the circle in the center. That's the approximate size of the finished bowl:

The waste wood looks like chocolate pie!

This is a photo of the faceplate and the center finder. I'm terrible at estimating where the faceplate should be placed. On this piece of wood it's not real critical if I don't get the faceplate absolutely centered but on rounded blanks of wood it is, so I thought I'd illustrate this. These two pieces screw together and in the center is a drill bit. I screw everything together and then I put the drill bit in my hand drill and drill the whole assembly into the center point that I found before I began cutting the blank:

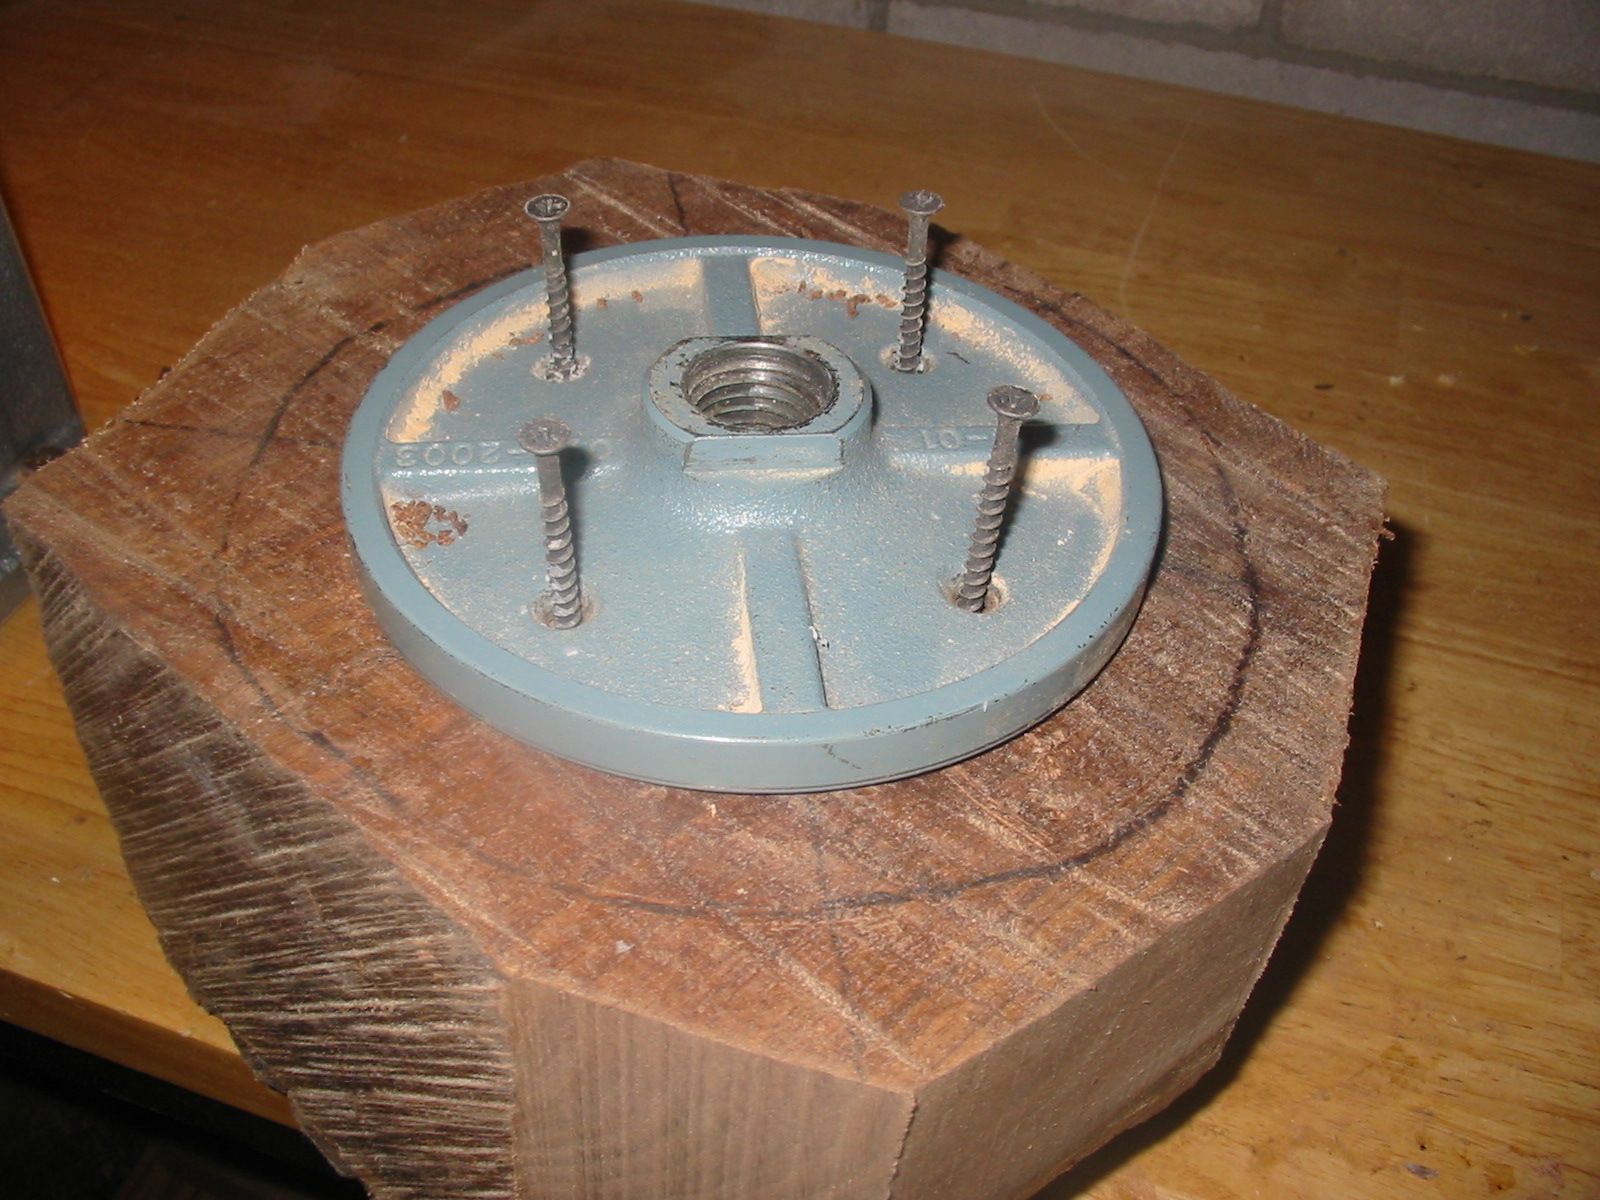
Here's the whole thing screwed down. Now I can drill holes for the screws and screw them in:

I used my hand drill for all of this. Much, much easier to do! Now the faceplate is properly centered and screwed on securely:
Now that the faceplate is screwed on, I've mounted the faceplate-wood blank on to the lathe and spun it by hand and it spins freely so we've gotten the blank on there correctly. Here is a photo of the tailstock and the tool rest in place. It's ready to turn:

Now before I begin turning this there is one last thing to do and that is to cut away a small section of tree bark were the tailstock is inserted. This will let me screw the tailstock firmly into solid wood instead of the bark, which is spongy and crumbly. Never screw anything into bark:

And I'm going to stop here. Tomorrow I'll begin roughing out the bowl with my roughing gouge. Tomorrow is going to be a really dirty, messy day but we'll wind up with the exterior of the bowl cut and shaped.
While I was working, UPS delivered a wood blank from Wood Turning Blanks 4U in Braedon, Florida. This is a wonderful source of turning wood and Steve and Diane, the couple who operate this, do a superb job of processing wood from trees that have fallen in storms or had to be removed for some reason. This keeps these marvelous sources of turning wood from either being ground up for mulch or dumped in a field somewhere. You can check our their site at: http://www.woodturningblanks4u.com/. I wish they would move to Minnesota.
Anyway, this blank is going to be the basis of another future project that we'll do together. This is silky oak:

Ok, it's cold and we're due for more snow this afternoon. Time to go in and talk to the cats. See you tomorrow.
VW
No comments:
Post a Comment