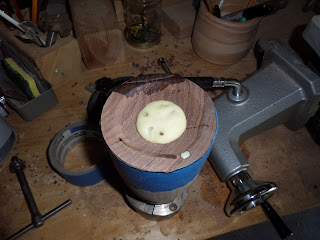
Well, my plan worked. I was able to hollow out the urn without damaging it. Here are the photos and some comments-
Here is the urn 24 hours later. I used a 1/2 inch diameter wooden plug to plug the center of the urn and I also used Gorilla Glue to glue it in place. This type of glue is water activated and I moistened the plug before I inserted it into the urn blank. This causes a chemical reaction which makes the glue expand. This whole thing is now firmly glued in place and didn't come loose while I was drilling it:
I began the drilling part of this with a 2" diameter Forstner bit but since that presents such a wide face, the drilling was going very slowly and I was afraid of cracking the blank again. I switched to a 1 1/2" bit instead and it readily drilled down into the blank without any problems. I then went back and re-drilled it with the 2" bit and that went well too. I now have a blank with a 2" diameter x 3" deep cylinder inside of it:
Volume of the urn is now 9.42 cubic inches. Here is a nifty calculator for figuring this out.
Here's a rather dark photo of the blank:
And here are two better photos outside:
What a relief!
Ok, my next step is to fashion a walnut plug for the top of the urn and to glue it in place. When that is finished drying I'll insert the threaded plumbing fixture into the plug and then at that point the body of the urn will be complete except for sanding and finishing.
Stay tuned,
VW


No comments:
Post a Comment