Wednesday, November 6, 2013

Scrap Wood Project-Pine Veggie and Dip Bowl-Finish photos

Welcome Back All,

Well, as its a little warmer now than it was this morning I decided to go back down to the shop and finish the veggie and dip bowl.

Let's look at the photos:

I've been looking at the bowl for several days and I decided it would look better and hold more food if it were hollowed out a little more so that's what I did. I deepened it by 3/4" and I also beveled the rims  This photo shows it mounted on the lathe before hollowing:


The next three photos show the bowl after it was hollowed out more and sanded. I sanded to 320 grit and polished it with pine shavings. This photo shows the end grain on the side of the bowl:


This is a photo of it looking down on it:


And this is it from the side:

Here are photos of the bowl with a coat of General Finishes salad bowl varnish:


As it's too cold for the varnish to dry today, I'll take it inside and let it dry over night and tomorrow and for the next several days I'll give it a very thin coat of varnish. Afterwards I'll polish it. Look for the final finish photos on Sunday.

VW

Snow, Wooden Buttons, and it's just too damn cold to work today

Hi Everyone,

Well, we got our first snow of the season last night. When I got up this morning about 1 1/2" of snow was on the ground. Here are some photos:


Burrr!

Ok, back to the button project

I bought a wooden dowel rod yesterday out of American cherry in order to produce buttons with a consistent diameter. And I decided to treat myself to a thin bladed Robert Sorby parting tool as this would be an ideal tool to use to cut the finished button off of the dowel. 

Let's take a look at some photos:

I cut off a short 5" section of the rod and mounted it in the chuck. This photo shows the rod with the end slightly rounded and a small circle drawn onto the face. This will help me to mark off the spots for the holes:


Here are the holes-I used a 5/64" bit again for this:


Ahhh, new tool!

And these are the finished buttons:


Comment:

The buttons are ok. They don't look like factory made buttons and I suppose that's part of their appeal. The parting tool works well to part off this small of an object without damaging it. It is difficult to get a consistent thickness however. Part of that is that I'm not used to working on small objects like this (I bet pen turners can turn these out by the dozen) and my shop isn't heated and my hands were getting stiff with the cold. 

I'm going to give these a light spray with spray lacquer later on today but I think it will take a lot more practice before I can turn out really nice looking buttons. 

_____

After I finished turning these, I got the stupid idea to try and make a coffee scoop. Those of you who have been reading the blog for a while will remember the numerous attempts I've made to produce a small scoop for ground coffee. Well, I salvaged some cherry wood from a tree in my neighborhood that was trimmed yesterday and decided to carve a scoop:

Here's the tree blank about to be trimmed on the bandsaw:


Gave up and split it in half:


I placed it in my wood vice and was about to begin carving it with a gouge when it slipped out of the vice and I nearly drove the gouge into my knee. By then my hands were frozen stiff. In all the years of woodworking and carving I've done, I've never injured myself but I came bloody close this morning so I decided to quit while I'm ahead and go inside and have some coffee.

We'll return to the coffee scoop adventure another time.

More later,

VW

Monday, November 4, 2013

Buttons! Making small wooden buttons on a lathe-Discussion and Plans


Hi Everyone,

Burrr....it's getting colder! Snow will be here soon so while we're waiting for that, let's make some buttons on the lathe. Here's the story behind that:

I have a wonderful friend who is a marvelous knitter. She makes all sorts of amazing garments-gloves, mittens, amazing scarves, out of all kinds of exotic yarn (one time she knitted a scarf out of yarn that contained an iron filament-woo hoo!). Anyway, she is currently knitting mittens that have an owl knitted onto the top of the mittens and the owls need an eye. Certainly they do. So I'm going to attempt to make several test buttons for her to try out.

Discussion

Buttons are a simple type of fastening technology that have a lot of technical demands on them. They have to securely and correctly fasten parts of a garment together, they have to hold up to daily or near daily use, they have to be capable of being laundered, and they have to do all of this and be lovely to see and hopefully enhance the garment they are attached to. They also have to be strong enough not to break and hold up to the high heat of ironing. A lot to ask of such a small thing.

Buttons are small objects and turning them requires smaller than normal tools. Fortunately I had the presence of mind to purchase a set of micro turning tools when I purchased my lathe and I've never regretted that as I've used them a lot over the years. I'll be using those along with an X-Acto razor saw to cu them free from the wood turning blank.

Plans

I'm going to make a set of 4, 1/2" wooden buttons out of jatoba wood. We'll be doing two different kinds of buttons: ones with holes in the face for sewing, and ones that have a shank in the back of the button for sewing.  We'll also use jatoba which is a hard, red-colored wood which should make a button strong enough to hold up on the top of a mitten and also to enhance the overall garment.

Let's take a look at the photos:

Buttons with holes through the face:

I have a small 1"x 1" jatoba stick left over from a long ago project that will be perfect for this:


I've cut off a 5" section from the stick and I'm going to mount it between centers and turn it to a cylinder 1/2" in diameter. Time to get out the calipers:


Here is the cylinder about 5 minutes later:


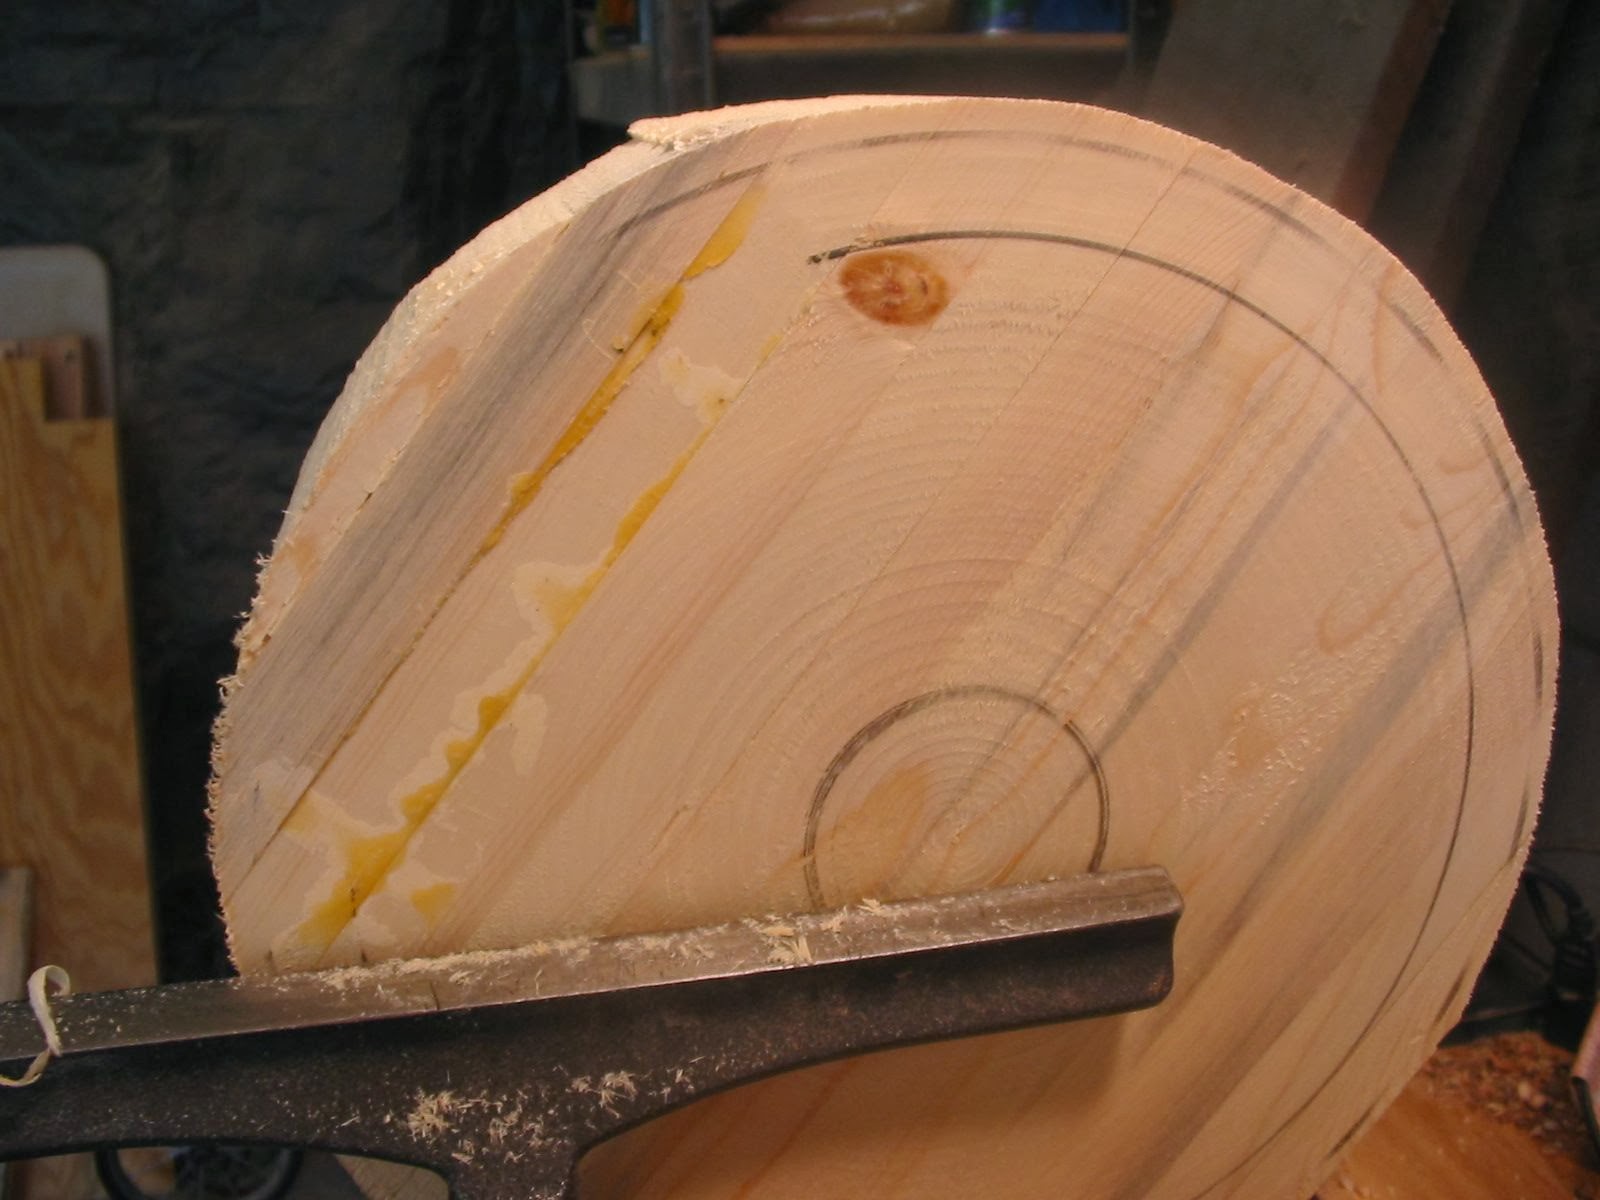
 And here is a short, cut off piece of the cylinder mounted on the turning chuck:


I rounded off the face of the button with a narrow gouge,  and sanded it smooth. Then I marked off a small circle with a pencil to establish the distance between the holes. I don't want them too close together as the wood between them might not be strong enough and could break at a future point in time (I told you this is complex) but narrow enough to easily sew them on for use with a button hole (note: the mittens these will be attached to won't have button holes but the button is a test piece and future buttons will need to meet this requirement):


Next, I'm going to drill the holes through the face of the button with a 5/64" drill bit and I'm going to do this as straight and as carefully as possible so as not to crack the button:


If you look carefully you can see the holes in the face of the button: 


 The next step involves cutting the button off of the turning blank. In the photo you can see the razor saw and the turning tool for separating the button. This is something to do very carefully as the button can crack or the edge can chip:


And here is the finished button. I sanded the back it gently for a moment on the sandpaper. Not bad:


Buttons with a shank on the back

Here is a photo of the turning blank. I've rounded off the face of the button and sanded it smooth:


 Next I've cut a small diameter shank in the back of the button:


And drilled a 5/64" hole through the shank:


And then I sanded and cut off the button with the razor saw. Here are the fronts of both buttons:


And the backs of the buttons:


 And here are the buttons with a drop of oil on them to bring out the color:


I'm going to make more buttons and refine the process a bit. I'll show you the finished product later this week.

VW


Scrap Wood Project: The Veggie and Dip Bowl, continued

Welcome Back Everyone,

To continue from yesterday: I've taken the bowl back down to the wood shop and I've deepened the two sections of the bowl so it will accommodate both the bowl in the center with veggies all around it.

Here are the photos:

This photo shows a side view of the bowl and if you look carefully you can see a little tear out in the end grain. I'm dealing with this by sharpening my roughing gouge and very gently shaving away the surface:

Here is the bowl after a couple of minutes-you can see how this is smoothing down the surface. It sure saves time on sanding!


Hollowing out the bowl was not difficult as it's well balanced and the wood is finely grained so it turned smoothly. I've fit the dip bowl to fit up to it's rim. You could use a bowl like this for nuts or other types of treats as well and it can be used with or without the dip bowl:


In this photo I've done a little preliminary sanding. I really like this bowl:


It's getting really cold outside and my hands are freezing up and I still have one more project to do, I'm going to stop and come back tomorrow and finish sanding it.

VW

Sunday, November 3, 2013

Scrap Wood Project-Veggie and Dip Bowl

Hi Everyone,

Well, the block that I made yesterday is dry and solid so let's turn it into a bowl!

Here's the photos:

Here is the block, dried and with the clamps off. I've located the center, drawn a circle. Let's go and cut it out on the bandsaw:


This is the blank on the lathe. You can see how uneven and gluey it is. I love turning laminated blocks as you go from rough mess to finished bowl and you really never know what it all is going to look like until you're done:

Here is the underside of the bowl after all the rough glued surface has been cut away:


The underside of the bowl is going to have a broad, flat foot. Here I've marked out the foot and the center mortise:

In this photo you can see how the edges and the foot have been trued up and flattened:


And here is the underside. I'm done cutting this part of the bowl. Next, I'll sand it smooth:


The sides of the bowl are going to be gently curved. I want to keep the bowl as close to it's original shape so as to preserve as much of the interior volume as I can. Here you can see the sides rough and in need of shaping:


I drew a line down the center of the side and I'm going to cut to arcs that will meet in the middle. One arc will start on the right edge and curve towards the middle and the other will begin at the left hand edge:


And here we are with the exterior wall of the bowl shaped and smoothed. Time to flip the bowl over and begin hollowing it out:

The bowl will have two sections: a center section that will hold a small bowl for dip and a larger section that will hold cut veggies. Here I've smooth off the top of the blank:


In this photo I've marked off the waste areas-these are the areas that will be removed:


I did a little hollowing of the bowl and then I stopped as it's getting cold and windy outside. Here is the bowl partially hollowed out. When I'm done the center will be deep enough to hold a dip bowl and there will be enough room for cut veggies:


Tomorrow I'll finish hollowing it and sand it smooth and we'll talk about finishes.

VW