Sunday, March 9, 2014

I'm Back, New Shop Squirrels, and Project Continuation

Well Hello World,

I'm back. The weather here in Minnesota is finally beginning to warm up. I never thought I'd call 35 degrees warm but after the weather we've had this winter, anything that doesn't instantly produce frostbite is welcome.

What's new

Well, during the great white winter I got some safety glasses and I can see sooo much better than I did with my old glasses. That was a big step forward. And I've done some cleaning and re-arranging in the shop although I'm going to take the first really warm day and really go through a lot of scrap wood, cans of stuff, and weed through all of it. I also got a new oval skew chisel that I've wanted for a long time and I'm anxious to try out. I also got a new computer as Ol'Betsy, my old computer, finally bit the dust several weeks ago. And I got a newer, lighter camera. I'm figuring out how the new system works bit by bit.

Bob the Shop Squirrel

Bob hasn't been seen in ages now and so I think he has, as a friend euphemistically put it, gone to Hollywood to make a movie and won't be coming back this way. In his place are two new grey squirrels that have taken up residence in the big tree that Bob used to live in. I've named them Neeps and Tattie and we'll see how they get on. I hope they become good friends like Bob was and I wish Bob every success in Tinseltown.

Music Box

When last we met I was working on a music box out of box wood for a family member who is due to have a baby this month. The cold and a mishap with a turning chisel knocked a big chip out of the lid of the box. So I set it aside and went back inside as it was just too cold to work. Today I went down stairs to pick up where I left off. Here are today's photos:

Here is a photograph of the lid as I left it. If you look closely you'll see a nick in the rim of the lid and that ruined the turn. So since there was a lot of wood left, I decided to turn it upside down and re-turn the entire block and make a new lid:


Here is the lid turned upside down and re-attached to the lathe. I cut off about 3/4" thick layer of wood right off the top to begin with. Then I started to round off the top:


Here is a side view of the lid and you can see how the surface of the lid is beginning to take shape:


I finished cutting the top of the lid and then I sanded it. As this is the end grain surface, it's going to take quite a bit of sanding to completely get it smooth. Here is the lid on the box. It fits snugly and I think the shape works well with the overall design:


In this photo I've taken the lid off and placed the box on the lathe. I'm going to cut off the waste wood on the bottom of the box. To keep the box on the lathe and to keep it from shifting as I cut, I placed it firmly between centers:


And here is the box with the bottom waste wood removed and the top placed back on top. This entire structure is about the size of a grapefruit:


What to do next:

I'm going to take the entire box and lid and varnish it lightly and let it dry overnight. This will stiffen the surface wood fibers, making it easier to sand and get a very smooth finish.

Then I'll take the box and begin hollowing it out from the bottom. This will allow the key from the music box mechanism to stick out underneath the box where it can be grasped for winding.

And the box will have a finial. I'm going to begin working on this tomorrow and I'm going to make it out of Brazillian cherry:


So there's more to do on this project.

I better go buy some more squirrel food!

See you tomorrow,
VW

Saturday, February 15, 2014

Neeps and Tatties al la Minnesota

Good Evening Everyone,

Well, I ordinarily don't do posting at this hour of the day but this is a special one and I'm dedicating it to my buddy Allison in Scotland, whose idea neeps and tatties are. And here is the story behind this:

Several weeks ago Allison mentioned neeps and tatties on her Facebook page and I saw the posting and had no idea what she was talking about. So I looked it up: it's mashed turnips and potatoes, prepared with butter and salt and pepper and after a few exchanges with Allison I decided to try it out. I couldn't find turnips locally here at the time but yesterday I did and I'm going to give this a shot.

Here is neeps and tatties with a few revisions to the original recipe:

Here are the basic ingredients-yukon gold potatoes and a turnip:


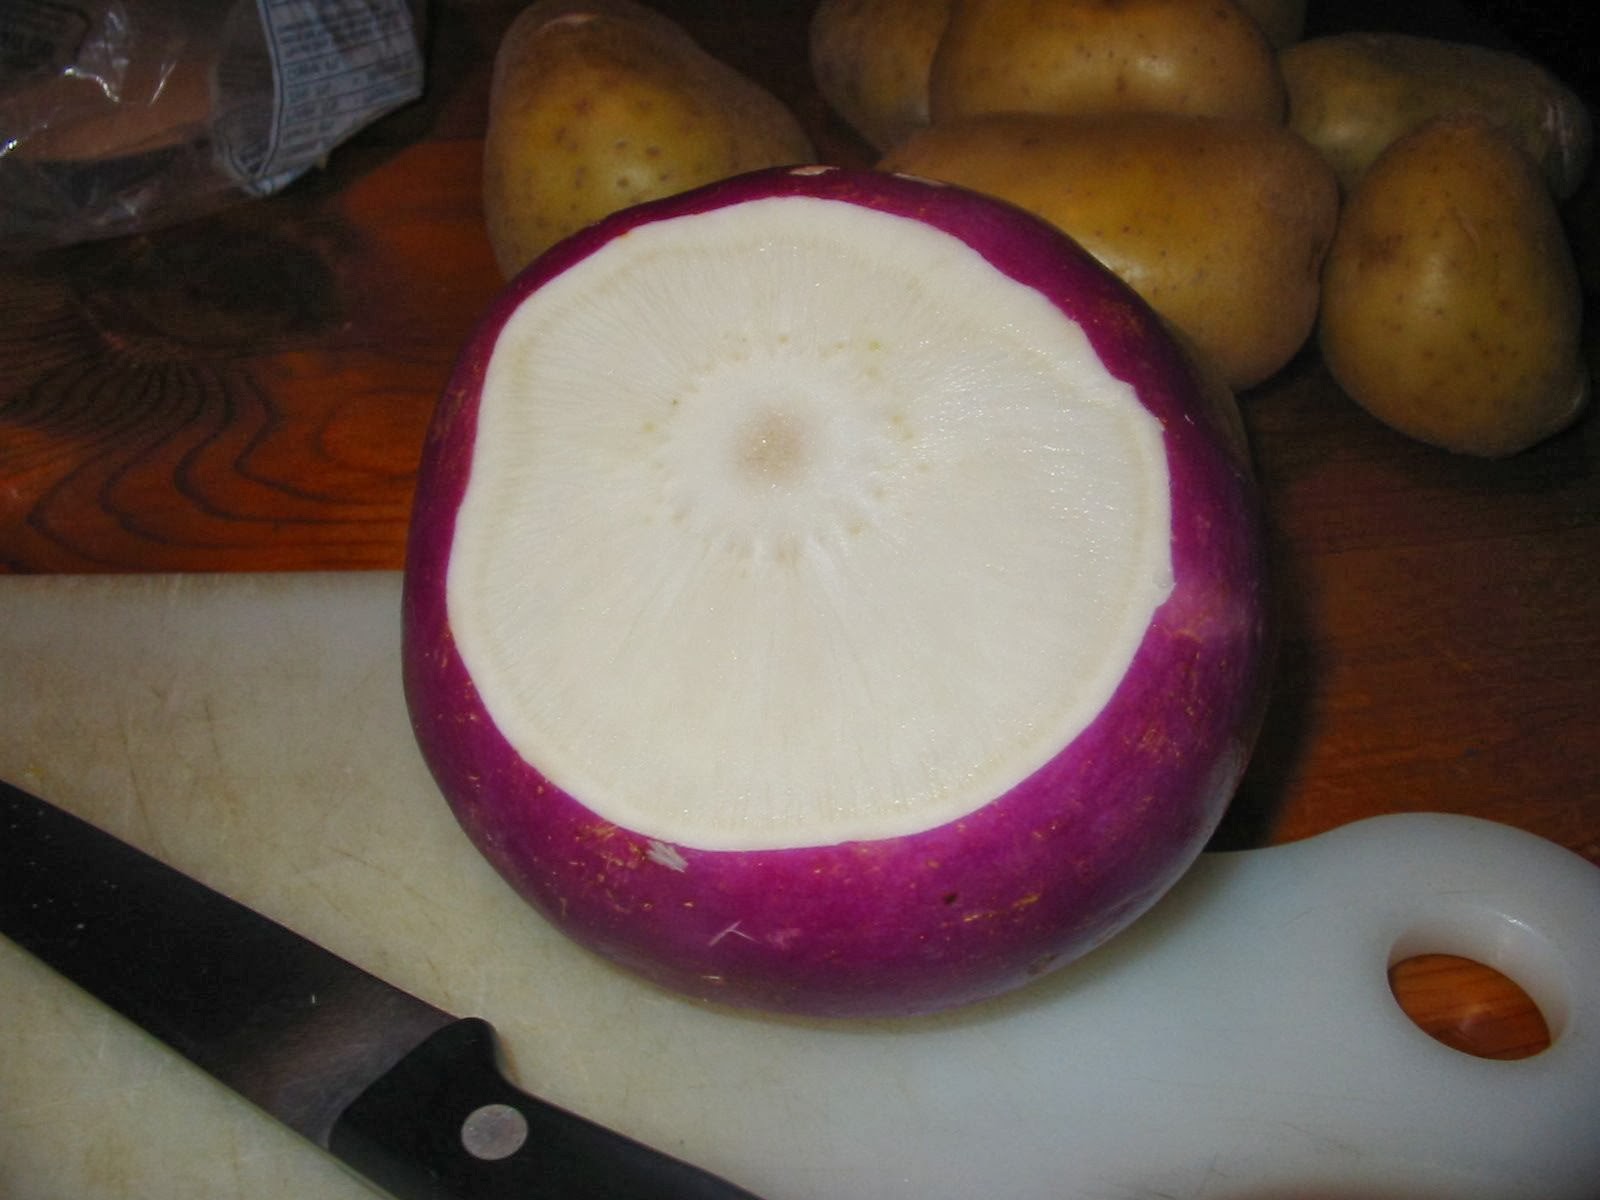
I don't think I've ever eaten a turnip or even bought a turnip. I don't know why, I just haven't. While I was preparing it, one of the kids came in and asked what it was and I told him and he said, "I don't think I'm going to eat that." So I lied and told him I wouldn't put it in the recipe. Sometimes you gotta do what you gotta do. Anyway here is the turnip with the top sliced off:


And here it is diced into chunks:

I put it in a sauce pan and boiled the chunks al dente:


Next, I peeled and cubed the potatoes. Pretty straight forward:

And I set those to cook until al dente as well:


After about 10 minutes of cooking I removed the veggies from the stove and drained them and let them drain for several minutes to get the water out of them. Then I added about 2-3 tablespoons of olive oil to a frying pan and heated it up:


And I added about 1 teaspoon of rosemary to the olive oil and cooked it for a few seconds until it turned brown:

And I placed the turnip and potatoes in the pan and sprinkled about 1/2 teaspoon of seasoned pepper over the top:


I covered it and turned down the heat to about 6 ( I don't know exactly what 6 means-it's probably half way between stone cold and incinerated) and let it brown for about 10 minutes:

After about 10 minutes I stirred up the neeps and tatties and kept cooking them until they were brown and crispy and cooked completely through:

Well, I liked them and my husband did too. I ate mine with some kippers and really enjoyed the meal. Older son ate them (heh, heh, heh) and Critter is in the process of shoveling them down. All in all, a keeper.

Note to Allison: I didn't make the traditional recipe like you described. I can't eat butter and I thought that browning them might make them more flavorful and thus more likely to be consumed by the Woodcock tribe too. But I enjoyed them and I'm having the left overs for breakfast tomorrow with a scrambled egg.

VW


Music box continued and we're getting more snow...sigh...

Hi Everyone,

I've decided to do an hour's worth of wood turning everyday regardless of how cold it is. I'm getting cabin fever and the only remedy for that is time in the wood shop. Period. End of discussion.

Here is my hour's worth for the day:

I was thinking about the music box and what the next several steps should be and I decided it might be a good idea to cut the exterior of the box. Doing this will help establish the thickness of the walls of the box. I don't want them too thick or the wood might muffle the sound of the music box mechanism. Too thin and the box might crack or break if dropped.  So I decided to shape the bottom edge and exterior sides of the box. Here are the photos:

I've decided to go ahead concave the sides of the box. Since it's a rather wide, squatty looking thing, I think pushing the sides in will alleviate that appearance somewhat. To keep the box firmly in the chuck jaws, I've decided to turn it between centers and I've moved up the tailstock to do just that:


I'm going to cut away that extra unneeded wood on the left side of the groove in the body of the box. I've also marked the center of the exterior so the concave surface will be symmetrical:


And here is the box about a minute later. Next I'm going to turn the bottom edge under. I used the long edge of my skew chisel for that:

And here it the bottom edge. Using the skew leaves the surface of the wood very smooth and I have great cutting control with the long edge of the skew pointing down towards the wood:


In this photo you see how the surface is starting to curve inwards. Whenever I turn a concave surface, or a convex one for that matter, I like to keep an eye on the horizon of the piece while I'm actively turning. I can see the shape appear instantly that way and I can get the entire surface symmetrical by doing it. This is one of the few examples when I'm not looking directly at the cutting surface of the chisel:


Here is  the shape thus far. It's not quite symmetrical at this point but I can even that out with a little light sanding. Ordinarily I would cut the shape out completely but since this wood is so soft, I can easily accomplish the finish shaping with some sandpaper and a few minutes of sanding:

Here is the box spinning on the lathe:


And here is the finished surface:


I decided while I was doing this to cut the tenon down about 1/4" and to widen the lip that the lid will sit on:

And here is the box-I've rotated the photograph to get a better idea of what it looks like standing upright:

My next step will be to hollow out the box another 1 ' 1 1/2". More on that tomorrow.

Well, it's snowing and it's time to go in and do the laundry. I'm beginning to recovery from my cabin fever.

More tomorrow,

VW

Friday, February 14, 2014

Thursday, February 13, 2014

Music Box, continued

Hi Everyone,

Well, the wood shop is bloody cold today but I had a break in my day and so I decided to go down and work on the music a little more. Here are today's photos:

Here is the turning blank. I've decided to shorten the box portion to 4 inches and I've cut a groove in the bottom to mark this off:

This is the first chance I've had to use the new jaws for the Nova chuck. The tenons on the ends of the blocks will fit into the jaws. This will hold the blocks securely while I'm turning:


I took the turning block over to the bandsaw and cut the block into two pieces, the box portion and the lid:

Next, I'm going to turn a tenon onto the box. I've marked off a 1/4 tenon and I'm going to use the bedan tool to cut it:

Hmm, this looks too small for a tenon. Not enough wood for the lid to sit on. I'm going to enlarge it to 1/2" inch instead:

Here it is a few minutes later:


 I've swiveled the tool rest over and I'm beginning to hollow out the box portion. I'd like to hollow it out to about 2 or 2 1/2". I was turning and as I was turning, my hands just began to freeze over and I couldn't hollow much more than about 1 1/4"--I just can't hold onto the handle of the turning chisel. So I'm going to stop and go in and let my hands defrost. I'll continue on later next week when it warms up some.
Stay tuned,

VW

Wednesday, February 12, 2014

The Music Box, continued

Hi Everyone,

Well, I went down to the wood shop just to look around and look at the basswood block for this project and of course I couldn't resist it and did a little turning. Here are some photos:

I trimmed the end off of the block and noticed a wee bit of spalting on the end grain surface. I guess this won't be a solid color box:


Here it is on the lathe. I'm just getting it ready to turn: 


OK, I COULDN'T RESIST IT!! I decided to do just a wee bit of turning and turned it into this 4 1/2" cylinder. This is a non-spalted side of the block:


And this is the spalted side: 

 And here it is with tenons on each end and I've marked the block for cutting away the lid:

The block I began with was 5x5x12" and I've turned it to just under 4 1/2" and it's still rather large for a music box. I may just narrow it down a bit. I'll cogitate on this over night.

It's great to be back to work again.

More later,
VW

Weather improving--making plans to resume turning: Music box-discussion and plans

Hi Everyone,

Welcome Back!!

Well, we've had a long cold winter here but according to the weather report, it's going into the 30s next week and with any luck it will stay there. So time to make hay while the sun still shines.

Here's the story behind this next project:

Our first project for the year will be a music box for some young cousins of mine who are having their first baby next month. I'm going to follow some music box plans along with some box plans that were recently posted on Woodturning Online and you can see both plans at:

Music box plans by Sy Plonsky: http://www.woodturningonline.com/Turning/Turning_content/Music-Box.pdf

Small box plans by Pam Reilly at: http://www.woodturner.org/community/youth/projects/Box.pdf

I'm going to use the music box plans to plan out the construction of the box and the placement of the music mechanism but turn it to resemble the small box produced by Pam Reilly.

Plans
The box that Pam made looks like it was turned out of a block of pure white holly. It's a really lovely looking box and the finial just sets of the color beautifully. The down side is that I don't have any holly and I'm not sure where I could get a kiln dried block of it (this is necessary to get this project completed in time for the birth of the baby). So I'm going to use a portion of a block of kiln-dried basswood instead:


As for the music box mechanism, I'm going to use an 18-note mechanism from Music Box Attic-they have Teddy Bear's Picnic, a personal favorite of mine. Here is their website: http://www.musicboxattic.com/18notebuy.html#.Uvu3teCLqeE.

And the finial on the top will be made out of a pen blank that I have. It's a lovely reddish-purplish-brown and should look nice. I'm also going to try to include a pexiglass interior lid to keep dust off the mechanism while allowing folks to be able to view the mechanism as it plays.

So we have a challenging project ahead. Stay tuned and keep your fingers crossed that the weather holds up through the completion of the project.

Stay tuned,
VW