Monday, October 21, 2013

Scrap Wood Project-Yarn bowl-sanding and beginning to finish

Good Morning All,

Well,  I went out for my morning walk this morning and walked right into a frozen rain-snow mix. And a lot of wind. It sure was cold but it was a welcome sight.

I went home and decided to work a bit on the bowl and here is where the project stands at present:

As I mentioned in a previous posting I'm making this for a friend who knits a lot and agreed to test the bowl for me. In emailing back and forth last evening, she wanted some finishing changes that upon thinking about them, I don't think would work well for this particular piece. That and she makes small handcrafts and this is a big bowl. I had it in mind to make large bowls for folks who make larger thinks like afghans and sweaters and use larger balls of yarn.

So I will be making her a smaller bowl in the near future that better suits her needs and esthetic requirements.

Back to the bowl:

I went down to the shop and sanded the bowl very well to smooth the surface and remove any surface scratching from the turn:


Then I took one of my French curves and drew the slot on one hole only. I think added an additional slot might weaken the bowl and cause it to break should it ever be dropped. I sawed it by hand with my coping saw:

And here it is with the slot in place. I then sanded it smoothly, along with the holes, so that yarn won't snag on the edge:


I decided to stain the bowl a natural pine color to deepen the yellow color and also to emphasize the reddish-brown color of the cedar foot. So I sealed the wood and then stained it inside and out:


And here is what it looks like at present. I may add an additional color to the outside wall between the foot and the lower edge of the rim. I'll cogitate on this for the next day or so:

I've brought the bowl inside as it's really getting cold outside and at this temperature, the stain won't dry. So inside it went.

I'm going to defrost my hands and have some lunch. I'll see you all tomorrow and we'll talk more about the finish. I'm beginning to have an idea...

VW

Sunday, October 20, 2013

Scrap Wood Project-The Yarn Bowl continued-hollowing out the center

Hi Everyone,

Well, it's getting colder and I've been outside working all afternoon and my hands are semi-frozen! Here's the latest from the workshop:

I finished turning the outside and I sanded it to 150 grit paper and it's smooth enough for a yarn bowl:


So I took off the faceplate, and flipped the blank over and screwed the faceplate back on with 1" #10 wood screws. I'm going to use the tailstock again to support this blank as it's very heavy and the screws are very short:


And here we are ready to go:


I turned it between centers for about 10 minutes and this is as hollowed out as I could make it. Time to remove the tailstock and hollow it out:


I like to drill out the center of bowls-it removed the center easily and establishes depth so I'm not cutting too deeply. Here I'm drilling out the center with a large Forstner bit:


Here is a photo of the blank with the center drilled out:

And this is that entire section of wood removed. I wound up drilling out the center several more times to reach the bottom as this bowl is really deep:


The bowl was quite deep at this point, in fact it was so deep, my tools wouldn't reach that far so I resorted to a large, heavy bowl scraper to remove the wood on the bottom of the bowl. I ordinarily don't use the scraper for this but it was the only tool I had that reached into the bowl and could cut with out a lot of vibration:

And it did a nice job of smoothing the inside:


 I worked on the bowl for another hour after the above photo was taken. I had to cut the interior until the holes that I drilled into the sides came through. Below is a photo of the bowl, off the lathe, with a flashlight inside so as to convey a sense of depth:


And here are several more photos-you can clearly see the holes in the sides:


Now, most yarn bowls have a hole-slot combination so a knitter can slide the yarn into the hole without having to break the yarn. I've emailed my friend to ask if she would like me to cut slots in the bowl. Until I hear back I'll continue to sand the interior and the rim of the bowl.

Stay tuned for the slot and the finishing.

VW

Thursday, October 17, 2013

Scrap Wood Project: The Pine and Cedar Yarn Bowl, continued

Hi Everyone,

Ok, back to work.

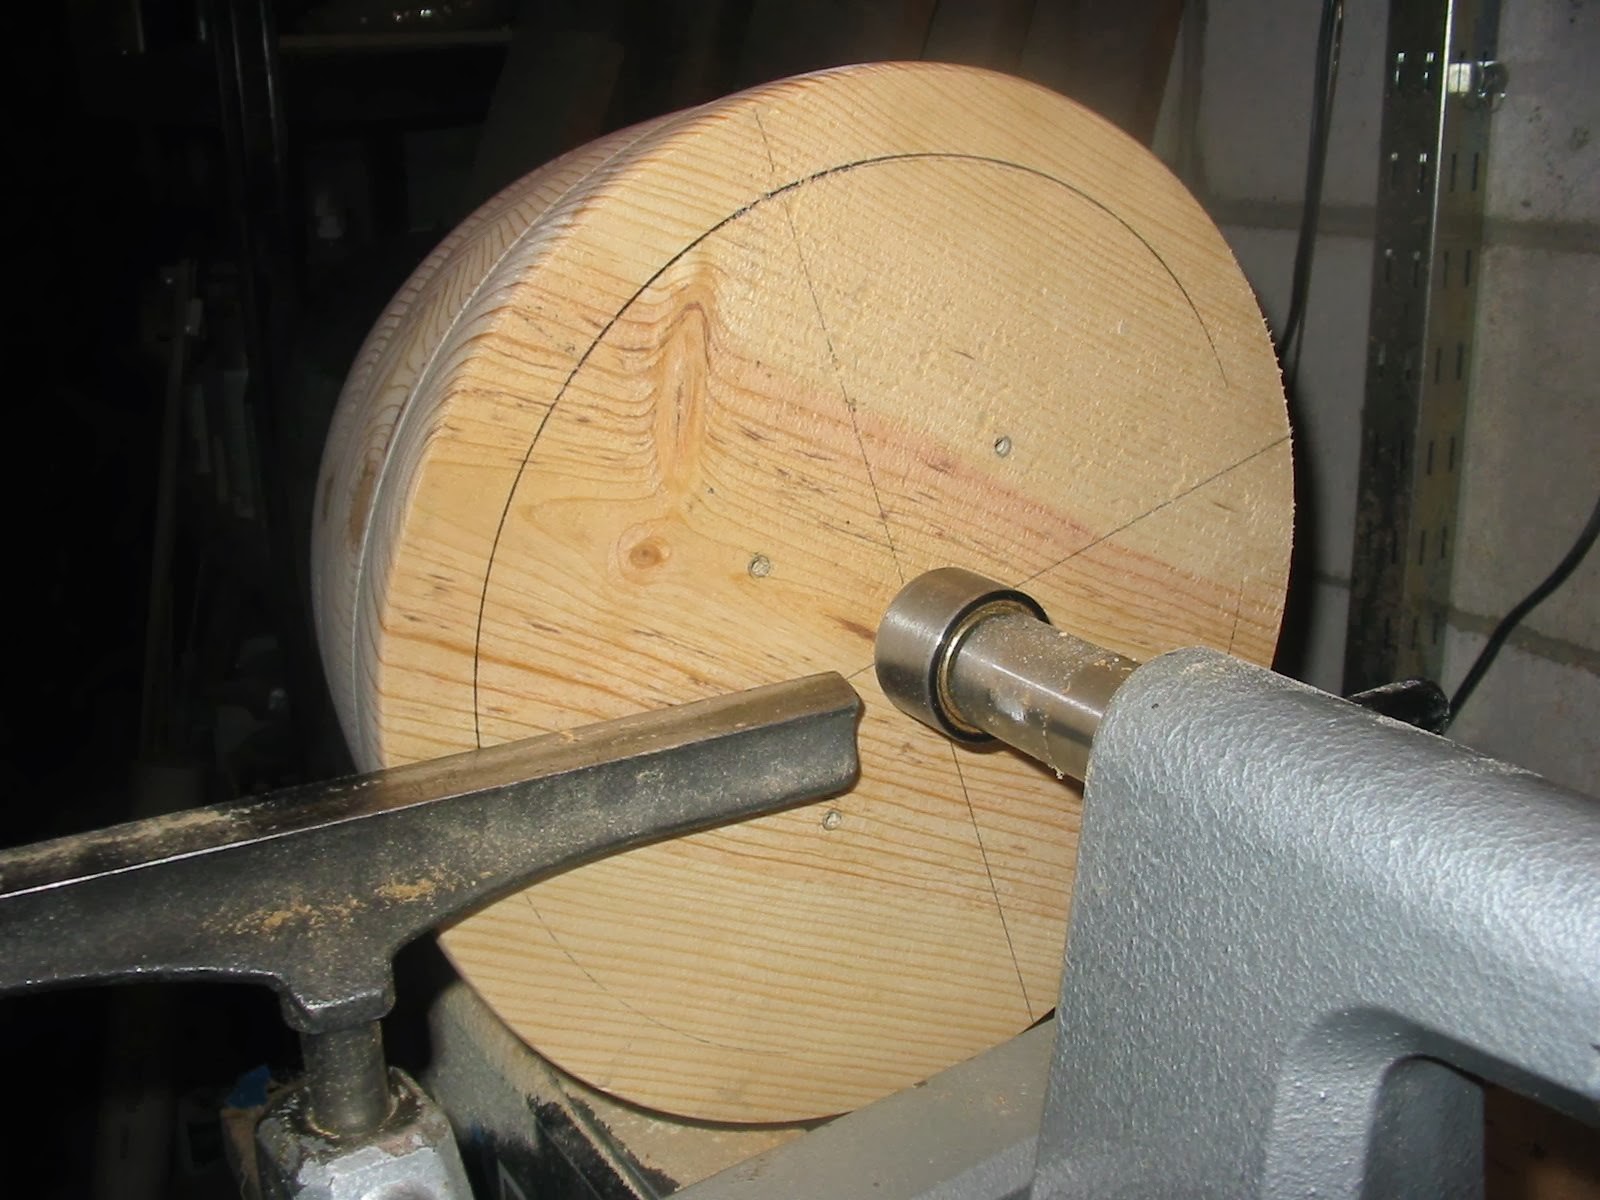
I've taken off the clamps and we have a large, well, humungous block of wood to turn.  Since it is so large and long I'm going to use a 6" face plate to attach it to the lathe:


I've used 2 1/2" long  #10 wood screws to attach the plate to the turning blank:


And here it is on the lathe. Note the position of the tool rest foot and the use of the tailstock:


Since this is a large blank and it's a little off center, I'm going to turn it slowly until it's trued up and lighter in weight. I'll start this at 300 rpm:


In this photo you can see that I've drawn a circle on the face of the foot of the bowl. To begin with I'm going to remove all the wood between the upper edge of the rim and this line:


This is a photo about 25 minutes into the turn. It's beginning to take shape:


Now, before I get to far into this I need to stop and drill a hole into the side of the bowl. This hole will serve as an exit for the yarn in the bowl. To cut the hole I've used a 1 1/4" Forstner bit for this and I'll drill two holes on opposite sides of the bowl:


Here is this photo I've marked the spot where I'm going to drill the hole. It's approximately half way between the base and the rim:


As I am going to leave the walls of this bowl rather thick, I've drilled down about 1" into the blank:


Now to work on the bottom of the bowl for a few minutes. I've drawn a 6" diameter circle on the bottom. This will enable me to accurately place the faceplate when I turn it over later on:

I've gotten a lot of shaping done at this point and I've used a skew to partially smooth down the sides of the bowl. I learned how to use a skew by using it with the point pointing downward, which is the opposite way you usually see them used. I find I have better control over it and I don't get many catches this way:

The skew is generally used for very fine cutting on the surface of bowls and other things and you should generally be producing what turner Nick Cook calls "angel hair shavings" or in other words, very fine shavings like you can see in this photograph:


I've also begun creating a rim on the bowl. Visually I think this will make the bowl look a little more detailed:


Now in this photo I have removed the tailstock and I'm going to create the foot:

In this photograph I've created a depression for the faceplate and flattened it so the faceplate will sit flat on the underside:

Now after this was done, I did a little rough sanding and here is what the bowl looks like at present:


Tomorrow, we'll sand it smooth and get it ready to finish. I'll use wipe on polyurethane for that. When the outside finishing is complete,  we'll flip it over and hollow it out.

See you tomorrow,

VW

Tuesday, October 15, 2013

Scrap Wood Project-Yarn Bowl/Discussion and Plans

Hi Everyone,

Well, it's gotten much cooler here and rainy too. What kind of weather is this? Yes, wood turning weather!!

Ok, our next project is a scrap wood project and here is the discussion behind this:

Discussion

I had some 12"x1" pine boards left over from a recent project along with a piece of 12"x2"western red cedar that I had been eyeing for a couple of days and wondering what I could do with all of it. I suddenly got the idea to laminate them all together and make a yarn bowl. Linda, my buddy who tests a lot of my kitchen ware, is also an amazing knitter and I got the idea she might like to try out a yarn bowl for me. I emailed her and she said yes but to make it deep with a wide bottom so it can't easily tip over. So this is what we're going begin making today.

Plans

I am going to make the bowl out of yellow pine with a red cedar bottom. If you google the words yarn bowl you'll see what they look like-typically a large, flat bottomed bowl with either several large holes drilled into the side or a hole-slot combination. The hole-slot thing allows the knitter to pass the yarn through the hole without having to break the yarn and it keeps the yarn in the bowl while it's being knitted.

I used 8 - 12"x1" pine boards and cut them into 11" circles and I did the same thing with the red cedar. I'm going to coat them liberally with wood glue, clamp them, and let the whole thing dry overnight.

Let's take a look at some photos:

Here is the stack ready for gluing. The whole thing is about 7"high and 11" wide and even though it looks huge in the photo, it's not very heavy, which is important for my lathe as I don't want to exceed the operational limits by turning too heavy a block. You can also see a line on the side-I've drawn that line on the edges of the boards to keep the end grain patterns lined up:


I'm going to use carpenter's glue and an old pain brush to spread the glue around. I've also laid down a plastic trash bag to help keep some of the glue off of my work bench:


I cleaned all the wood dust off of the surfaces and applied a very thick bead of glue:


Next I spread the glue evenly across the surface, making sure that the edges have a thick, even layer:


And I did that repeatedly. Here is what the whole thing looks like at the moment:


Now, for difficult part: clamping the whole thing together. Laminated turning blocks need to be really solid and this means having enough clamps to produce even, hair-line joints in the block and ultimate in the bowl itself.  I used as many clamps as I can fit around the edge of the block, which in this case was 8 clamps:


Screwing down the clamps always makes the wood shift around a little so it's helpful to have a mallet, in the photo you can see I use a plastic mallet, to gently tap it in place:


And then I clamped the hell out of it. Screw it down as tightly as possible. You should see glue oozing out of the sides of the block:


And I'm going to let it sit for 24 hours. We'll come back to this tomorrow.

VW


Sunday, October 13, 2013

Project completion-Headboard out of Western Red Cedar

Hi Everyone,

Well, a spare minute finally came my way today and I and my husband and son and Rhubarb the Ginger Majesty got the headboard attached to my son's bed. Here are the photos:

I changed the legs for the headboard from the original Ana White plans. The legs consist of two 2x4s, a short one in the front and a longer one in the back. Both will be bolted on to the bed frame with 5/6" x 3 1/2" bolts and nuts:


This is what the completed legs now look like.The headboard frame will sit on top of the shorter 2x4:


Here is a photo of my husband Jim and the headboard. You can just see how the headboard sits on the legs. And of course Rhubarb the Ginger Majesty is supervising...


And this is the headboard in place with some new bedding for my son:


Ok, this is finished.
_____________________

My next project will be a yarn bowl out of some of the left over cedar from the bed headboard and some scrap pine I've had laying around for a while.

Stay tuned,

VW