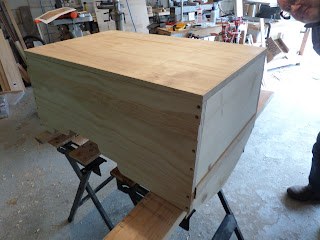
Well, today was the first day that I have been well enough to assemble the baby cradle. After my last blog posting I got really, really sick and basically life stopped for about 10 days while I recuperated. But I am better and so I decided to continue working on the cradle and get it finished. It's about 28 days until the baby's due date so here we go:
The cradle consists of two structures: the cradle box and the rockers.
Here's the cradle box:
My husband Jim the engineer and my youngest son Critter gave me a hand today with the assembly. The first thing that needed to be done was to bevel the bottom edges of the side panels and that took quite a bit of work as I have a very small table top table saw and the boards are rather long and awkward. We did manage however to figure out the correct bevel angle and set up. This is Jim about to saw the boards:
Here is another photo of the edge running through the saw:
Cutting the side panels was successful. The next step was to drill the screw holes for the wood screws:
Here you can see that all the screw holes were countersunk to accept a wooden plug and you'll see a photo of that in a minute or two:
This is Critter giving me a hand. It's really cold outside and my hands just got very cold and stiff so the help was appreciated:
Here's Jim and Critter, the human wood clamps, helping to line up one of the end panels for drilling and screwing:
And here is a photo of one of the end panels. Everything went together very well:
Here it is screwed together. Not bad:
With that done, the next step was to cut the bottom panel and screw it onto the sides. This is Jim measuring:
Ha! Critter decided to warm up some leftover pizza. Looks like it got nuked instead!
Trimming the bottom panel down only took a couple of minutes. Here it is just sitting in place:
And here it is drilled and ready to be screwed in place:
And here is the box portion of the cradle, completely screwed together:
And here are those countersunk screw holes I told you about:
The Rockers
This part was very straight forward. It's just the rockers screwed onto a center 2x4. This entire thing will be screwed to the underside of the box. And yes, the rockers actually rock back and forth:
And here it is assembled and undergoing an inspection:
A very complete inspection:
Stay tuned for the completion photos. We're almost there. And so is my grandson!
VW


No comments:
Post a Comment