Hi Everyone,
I want to wish everyone, no matter where you are, a wonderful day and if you're in the US, a terrific Thanksgiving day!
See you this weekend.
VW
Thursday, November 28, 2013
Monday, November 25, 2013
Back to Work-Project finish photos
Hi Everyone,
I'm back to work and slowly getting back into to the swing of things. While I was busy last week I had a couple of hours to kill and so I completed a couple of recent projects.
Here are the finish photos:
The Oatmeal Bowl
This is the bowl I started for a cousin of mine in California. I've been reading Robin Wood's bowl book and was entranced by the wooden bowls that were retrieved from the excavation of the Mary Rose that he writes about. I wanted very much to do a couple of projects based on the design of those 500 year old bowls so I created several turning blocks out of a linden wood tree branch that I retrieved earlier this summer. My intent then was to produce bowls similar in shape, design, and size to those bowls used by the crewmen onboard that ship.
Here is the first. It's a little larger than a personal soup sized bowl. The wood contains a lot of mineral staining and it has a rather rustic look to it. This is the interior of the bowl:

And this is a side view. You can see that the bowl is a little distorted and that was intentional on my part:

And the bowl will be mailed to my cousin later this week along with one of my cooking spoons and a bag of my favorite steel-cut oats and a brief history lesson:


Here is a photo of the interior along with a smaller, eating sized spoon that I made for him. As he's something of a foodie I'm also sending him a bag of my favorite steel cut oats for him to experiment with:

The Kuksa
Along with the above two bowls, I produced a small kuksa, which is a small wooden cup. I carved it down from the larger cup-blank of several weeks ago and here it is at present. Turning this with the handle protruding was a real pain and so I don't recommend trying to turn a kuksa in this manner. The next time I do this I'll turn a wide section just beneath the rim and carve out the handle from that.

This still needs some refinement and I'll have to think of a good finish for this. I'll probably finish it with salad bowl varnish like the bowls above:

The Veggie-Dip Bowl
This came out rather well. I'm sending this to a friend in a week or two as a Christmas present. I hope she'll enjoy it:

I think we can stick a fork in those projects and call them done.
It's freezing cold outside and it's also Thanksgiving week here in the US so I'm going to put off started my next project until the end of the week when it's supposed to warm up some.
The next project is the long promised box elder bowl for a friend of mine. See you all on Friday.
VW
I'm back to work and slowly getting back into to the swing of things. While I was busy last week I had a couple of hours to kill and so I completed a couple of recent projects.
Here are the finish photos:
The Oatmeal Bowl
This is the bowl I started for a cousin of mine in California. I've been reading Robin Wood's bowl book and was entranced by the wooden bowls that were retrieved from the excavation of the Mary Rose that he writes about. I wanted very much to do a couple of projects based on the design of those 500 year old bowls so I created several turning blocks out of a linden wood tree branch that I retrieved earlier this summer. My intent then was to produce bowls similar in shape, design, and size to those bowls used by the crewmen onboard that ship.
Here is the first. It's a little larger than a personal soup sized bowl. The wood contains a lot of mineral staining and it has a rather rustic look to it. This is the interior of the bowl:

And this is a side view. You can see that the bowl is a little distorted and that was intentional on my part:

And the bowl will be mailed to my cousin later this week along with one of my cooking spoons and a bag of my favorite steel-cut oats and a brief history lesson:

Sharing Wood Turning bowl:
This is the bowl I made with my nephew several weeks ago when he was here visiting. I really enjoyed getting to know him again while he was here and he seemed to enjoy his brief intro to wood turning. We produced a small bowl than the previous bowl and this has a slightly different rim. Both bowls have chamfered rims like the originals which enabled their owners to drink from them as well as eat from them:

The Kuksa
Along with the above two bowls, I produced a small kuksa, which is a small wooden cup. I carved it down from the larger cup-blank of several weeks ago and here it is at present. Turning this with the handle protruding was a real pain and so I don't recommend trying to turn a kuksa in this manner. The next time I do this I'll turn a wide section just beneath the rim and carve out the handle from that.

This still needs some refinement and I'll have to think of a good finish for this. I'll probably finish it with salad bowl varnish like the bowls above:

The Veggie-Dip Bowl
This came out rather well. I'm sending this to a friend in a week or two as a Christmas present. I hope she'll enjoy it:

I think we can stick a fork in those projects and call them done.
It's freezing cold outside and it's also Thanksgiving week here in the US so I'm going to put off started my next project until the end of the week when it's supposed to warm up some.
The next project is the long promised box elder bowl for a friend of mine. See you all on Friday.
VW
Sunday, November 17, 2013
Temporary Work Stop
Good Evening All,
We've had a death in our family and so I'm going to not do any posting this week. I'm sorry for the delay in the project posts but it's unavoidable.
I will be back at work this coming weekend.
Best,
VW
We've had a death in our family and so I'm going to not do any posting this week. I'm sorry for the delay in the project posts but it's unavoidable.
I will be back at work this coming weekend.
Best,
VW
Thursday, November 14, 2013
Turning a kuksa-video
Hi Everyone,
For those of you who are following this project with the intention of turning a cup with a handle, there is a very good video on YouTube posted by a guy named Bernie who lives in Norway. The steps in the video are very close to the project steps in my last posting.
Go to: http://youtu.be/BqkWYtZPK4U
Great minds think a like!
VW
Kuksa-Turning a small wooden cup on a lathe-Discussion and Plans
Hi Everyone,
I've been trying to produce a kuksa for sometime now. Kuksas are small, hand carved, wooden cups that are common on the Internet and have probably been produced by people who lived in forests for thousands of years and if you google the word you'll see lots of photographs of them.
I've wanted to make one and the first several attempts I made were produced by carving them but having arthritic hands meant that I never could quite hollow the cup. That and the general results not being very appealing meant that they've all wound up in the trash.
Discussion & Plans
I have quite a bit of linden wood in the shop at the moment and I had a large left over chunk from several bowls I've turned the past several days. I didn't want to throw the chunk away so I decided to try to turn and hand carve a kuksa out of it. The outside of the cut will be roughly turned and then refined by carving and the inside will be totally hollowed by turning. And the kuksa will have a single handle similar to the handles on the porringer I did earlier this week.
Let's take a look at the photos thus far:
This is the blank that I began with. I've bandsawed it out of a chunk of linden wood and you can clearly see the handle area sticking out from the side:

And this is what it looks like on the lathe:

I placed it between centers and turned it very slowly at first-200 rpm and began roughing off the side and the bottom. Needles to say the piece is unbalanced so it is going to be turned slowly for a while:

Here is a photo of the bottom. I've trued up the bottom and cut a mortise so I can flip it over and attach it to the lathe. Time to turn it over and work on the rim a bit:

Here it is before I began to turn the rim/top of the cup:

Here is the top of the cup after about 15 minutes of very careful, slow turning. I cut from the outside rim towards the inside. This helps to keep the blank on the lathe. Turing from the inside towards the outside can cause the blank to dislodge and come off. The top of the piece is flatter now:

I turned the cup over, locked the lathe in place, and began to do some roughing out of the exterior of the cut by hand. I use a 2" carpenter's chisel to take off the uneaven, unturned sections of the cup:

I also used a drawknife:

This is the cup so far. I also sawed the handle area a little bit and I've created a groove along the bottom. Eventually I'm going to cut off the bottom and round it some to make it easier to hold in the hand. I also don't want to make the cut too deep, just enough for a quick cup of water. After this point it was time to flip it over again and begin hollowing it out. All of the work on the exterior from this point is going to be done by hand. This saved me a lot of hand work:

Time to begin hollowing. I hollowed it out about 1mm at a time, from the outside towards the inside of the cup:

Here is the interior after about 5 minutes of slow cutting. It's about 1" deep:

Here you can see I've drilled a hole into the bottom of the inside of the cup. I did this to help establish the depth of the piece and to make turning the center of the interior a little easier:

And here is the cut fully cut out. It's about 2" deep at this point:

Now, next time, I'll refine the rim and make it narrower for drinking, and I will probably turn the exterior of the cup a little narrower so as to make it fit in my hand a little easier. Then I'll carve out the handle and lastly smooth the exterior by hand.
Stay tuned,
VW
I've been trying to produce a kuksa for sometime now. Kuksas are small, hand carved, wooden cups that are common on the Internet and have probably been produced by people who lived in forests for thousands of years and if you google the word you'll see lots of photographs of them.
I've wanted to make one and the first several attempts I made were produced by carving them but having arthritic hands meant that I never could quite hollow the cup. That and the general results not being very appealing meant that they've all wound up in the trash.
Discussion & Plans
I have quite a bit of linden wood in the shop at the moment and I had a large left over chunk from several bowls I've turned the past several days. I didn't want to throw the chunk away so I decided to try to turn and hand carve a kuksa out of it. The outside of the cut will be roughly turned and then refined by carving and the inside will be totally hollowed by turning. And the kuksa will have a single handle similar to the handles on the porringer I did earlier this week.
Let's take a look at the photos thus far:
This is the blank that I began with. I've bandsawed it out of a chunk of linden wood and you can clearly see the handle area sticking out from the side:

And this is what it looks like on the lathe:

I placed it between centers and turned it very slowly at first-200 rpm and began roughing off the side and the bottom. Needles to say the piece is unbalanced so it is going to be turned slowly for a while:

Here is a photo of the bottom. I've trued up the bottom and cut a mortise so I can flip it over and attach it to the lathe. Time to turn it over and work on the rim a bit:

Here it is before I began to turn the rim/top of the cup:


I turned the cup over, locked the lathe in place, and began to do some roughing out of the exterior of the cut by hand. I use a 2" carpenter's chisel to take off the uneaven, unturned sections of the cup:

I also used a drawknife:

This is the cup so far. I also sawed the handle area a little bit and I've created a groove along the bottom. Eventually I'm going to cut off the bottom and round it some to make it easier to hold in the hand. I also don't want to make the cut too deep, just enough for a quick cup of water. After this point it was time to flip it over again and begin hollowing it out. All of the work on the exterior from this point is going to be done by hand. This saved me a lot of hand work:

Time to begin hollowing. I hollowed it out about 1mm at a time, from the outside towards the inside of the cup:

Here is the interior after about 5 minutes of slow cutting. It's about 1" deep:

Here you can see I've drilled a hole into the bottom of the inside of the cup. I did this to help establish the depth of the piece and to make turning the center of the interior a little easier:

And here is the cut fully cut out. It's about 2" deep at this point:

Now, next time, I'll refine the rim and make it narrower for drinking, and I will probably turn the exterior of the cup a little narrower so as to make it fit in my hand a little easier. Then I'll carve out the handle and lastly smooth the exterior by hand.
Stay tuned,
VW
Wednesday, November 13, 2013
The Annual Blue House Christmas Boutique is coming!
Good Morning Everyone,
Wow! The annual Blue House Christmas Boutique is coming! Join everyone at St. Matthew's Episcopal Church in St. Paul for the annual Christmas sale. The sale benefits the Blue House, an orphanage for children in Uganda that was started by the late Beatrice Garabanda. There are all sorts of neat things for sale: food, handcrafts, and of course fine handmade wood work from your's truly.
And if you're a fan of Selkie Wood Works, then I would really love to meet you. I'll be there around 10, eating free samples and tripping over my own feet and talking about wood turning to anyone who will listen.
The sale will be held on December 7 & 8, from 9am - 3pm on Saturday and 9 am -1pm on Sunday at St. Matthew's Episcopal Church, 2136 Carter Avenue, St. Paul. And on Saturday only they serve lunch with the best soup you've ever tasted.
Do your holiday shopping!
Meet some great people!
Support a great cause!
See you there!
VW
Blue House Christmas Boutique
St. Matthew's Episcopal Church, St. Paul, MN
Monday, November 11, 2013
Oatmeal Bowl is finished, and it's colder than a well-digger's you know what here
Hi Everyone,
Well, the apprentice and I did not get to finish the bowl together. He has been ill and recovering from some surgery earlier this year and just recently got out of the hospital. He had been having some minor nose bleeds the past week and yesterday had a good sized nose bleed and had to visit the ER for treatment. I didn't want to take him into a cold, dusty environment and he's on his way home today so we couldn't finish the turn. But I did go down and finish the turn and he'll be able to see online how this went.
Here's the photos:
This is the bowl back on this lathe today and fortunately it hasn't distored. If you look closely you can see the extensive end grain tearing and the whole thing needed to be hollowed out a lot more and that is what I did. I thinned the walls and then I sharpened by bowl gouge and turned the speed up to 900 rpm and very gently shaved the sides until they were smooth. Then I deepened and rounded out the bottom of the bowl:

This is the bowl after it's been shaved. It needed very little sanding. I've also refined the rim a little and removed some tearing along the rim's edge:

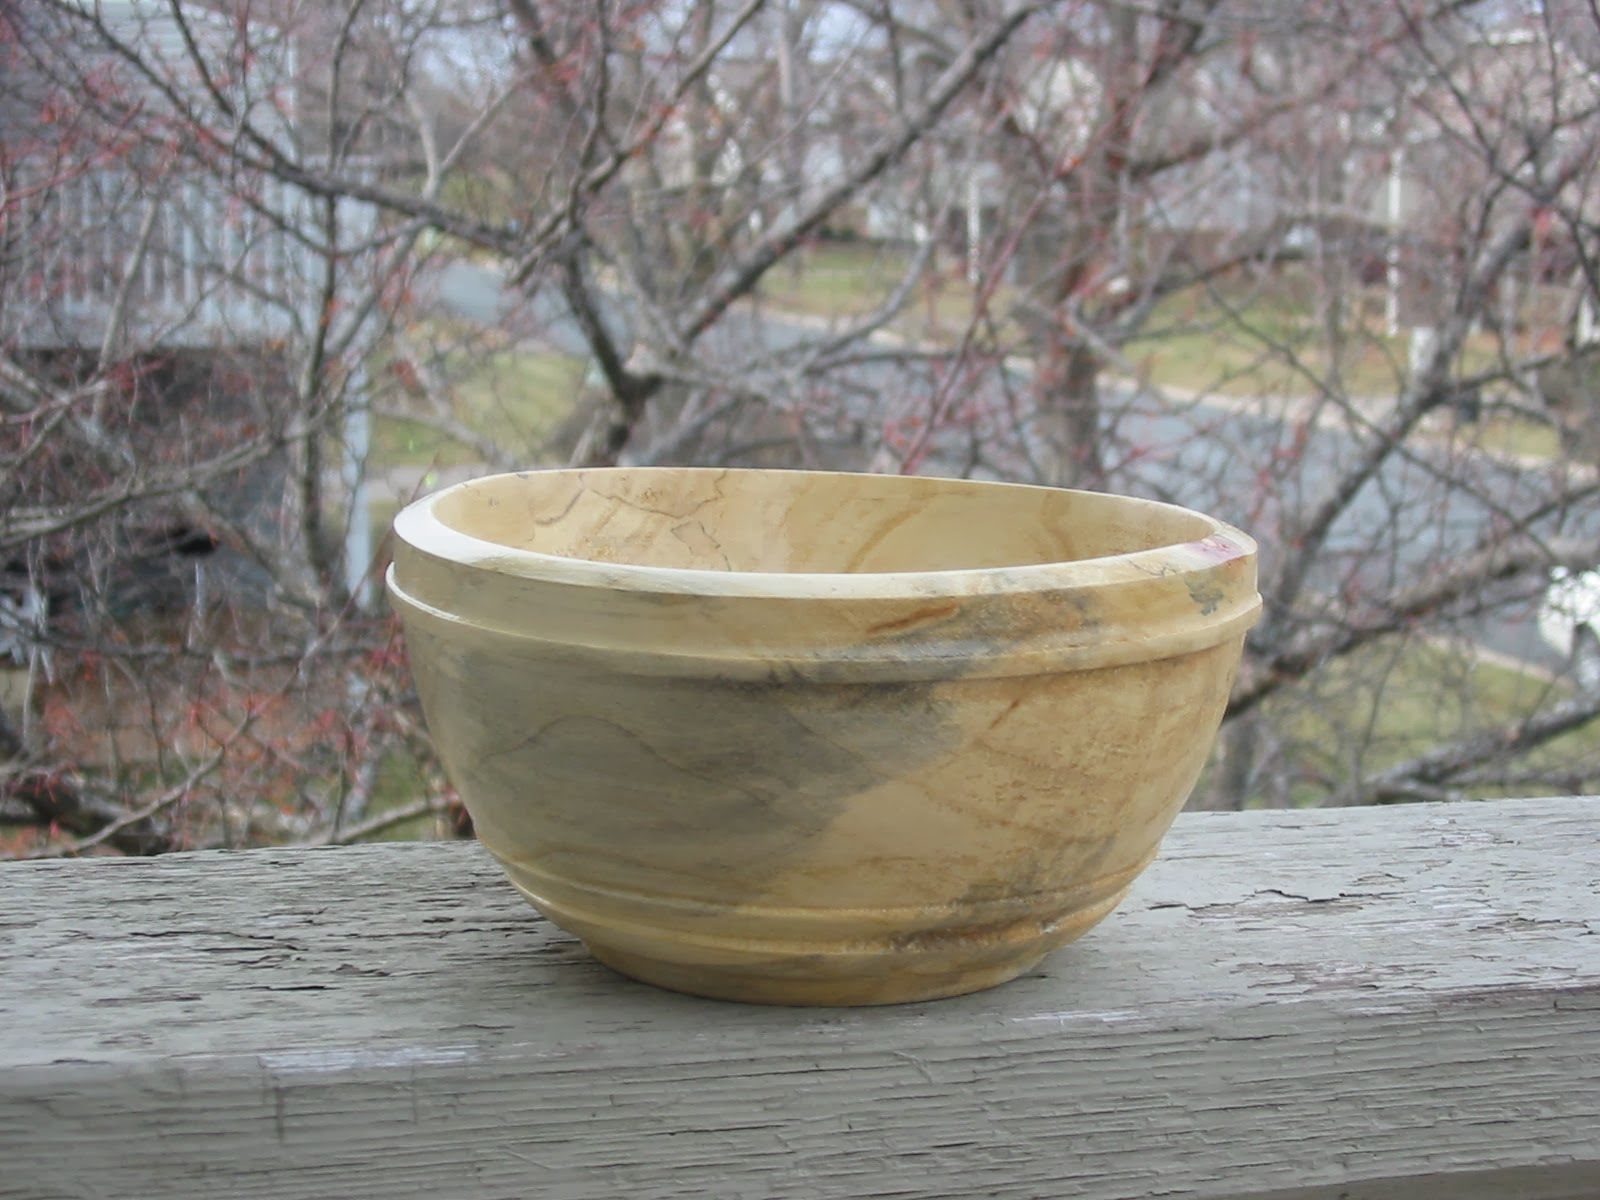
And here is the finished bowl. It's got lots of mineral staining and some spalting lines. The color is a buff color and so when I've applied the salad bowl varnish to it, it's going to be really pretty:

This is the bowl from the side:

Now, since this was unseasoned, it has to go in the drying bag for 2 weeks to dry out and stabilize. We'll come back to it then and take a look. If the wood fairies are kind to us, it will still be round and un-cracked and ready for varnishing.
So stay tuned for this one at the end of the month.
My next project is a bowl for my friend and colleague, John S.
See you later in the week.
VW
Well, the apprentice and I did not get to finish the bowl together. He has been ill and recovering from some surgery earlier this year and just recently got out of the hospital. He had been having some minor nose bleeds the past week and yesterday had a good sized nose bleed and had to visit the ER for treatment. I didn't want to take him into a cold, dusty environment and he's on his way home today so we couldn't finish the turn. But I did go down and finish the turn and he'll be able to see online how this went.
Here's the photos:
This is the bowl back on this lathe today and fortunately it hasn't distored. If you look closely you can see the extensive end grain tearing and the whole thing needed to be hollowed out a lot more and that is what I did. I thinned the walls and then I sharpened by bowl gouge and turned the speed up to 900 rpm and very gently shaved the sides until they were smooth. Then I deepened and rounded out the bottom of the bowl:

This is the bowl after it's been shaved. It needed very little sanding. I've also refined the rim a little and removed some tearing along the rim's edge:

And here is the finished bowl. It's got lots of mineral staining and some spalting lines. The color is a buff color and so when I've applied the salad bowl varnish to it, it's going to be really pretty:

This is the bowl from the side:

Now, since this was unseasoned, it has to go in the drying bag for 2 weeks to dry out and stabilize. We'll come back to it then and take a look. If the wood fairies are kind to us, it will still be round and un-cracked and ready for varnishing.
So stay tuned for this one at the end of the month.
My next project is a bowl for my friend and colleague, John S.
See you later in the week.
VW
Saturday, November 9, 2013
Sharing Wood Turning, continued
Good Evening All,
Well, I had a terrific evening with my nephew in the wood shop hollowing out the oatmeal bowl.
Here's the photos:
In my previous posting I turned the outside of the bowl. In this photo you see Michael hollowing out the bowl with a 3/8" Sorby bowl gouge. He hollowed out about 80% of the bowl with me helping to establish the inner curvature of the bowl and the depth of the turn.

This is the bowl about an hour later. I've placed a biscuit in it so you can discern the depth of the bowl:

Now tomorrow we're going to deepen the bowl and then sand it smooth. Once that's completed, I'll wrap the bowl in several paper shopping bags and let it dry for about 2 weeks. Then I'll take it out and apply a finish to the surface. Michael will be home by then so he won't be able to complete the turn but he'll get to see how a bowl is turned and finished to completion. When he returns next spring during Spring Break, I'll have a project ready for him to do from beginning to end that he can take home and display to his friends and family.
Ok, have a good night and see you all tomorrow.
VW
Oat Meal Bowl
Ok, I'm back.
The bowl I began has changed a little bit from what I had originally intended. This is going to become an oatmeal bowl for a cousin of mine in California. Here's the story:
I have a lovely cousin who is a retired educator in California and judging from her life and the lives of those folks around her, she was, and is, an exceptional person. And she's helped to support another cousin of ours who has been very ill this year. And since caregivers are always on the top of my list of super people, she gets a special bowl.
Now the oatmeal part of this addresses the fact that being a busy person, she eats, gasp, microwaved oatmeal. I can't think of anything worse than that. So she's getting the bowl, one of my hand carved spoons, and a bag of steel cut oats for her birthday next month.
If you remember from yesterday, I split a linden tree branch and made a bowl blank out of a section of it that I band sawed off the branch:


And I began shaping it. I was going to make another porringer but given the size of the resulting blank, I decided to make her a simple wooden bowl, similar to bowls made in England several hundred years ago. This isn't a reproduction or replica per se, simply a bowl based on those earlier designs with some modern touches to make it easy to use and maintain:


Here's today's production photos:
I've cut the bowl down more and created a rim and left a shorter foot so it doesn't sit so tall. That should make it easier to eat out of:

This what it looks like from the side. And you can get a better sense of the color of the wood.

This evening my nephew Michael and I are going to hollow it out and get it ready for drying and finishing in the coming weeks.
Stay tuned,
VW
The bowl I began has changed a little bit from what I had originally intended. This is going to become an oatmeal bowl for a cousin of mine in California. Here's the story:
I have a lovely cousin who is a retired educator in California and judging from her life and the lives of those folks around her, she was, and is, an exceptional person. And she's helped to support another cousin of ours who has been very ill this year. And since caregivers are always on the top of my list of super people, she gets a special bowl.
Now the oatmeal part of this addresses the fact that being a busy person, she eats, gasp, microwaved oatmeal. I can't think of anything worse than that. So she's getting the bowl, one of my hand carved spoons, and a bag of steel cut oats for her birthday next month.
If you remember from yesterday, I split a linden tree branch and made a bowl blank out of a section of it that I band sawed off the branch:


And I began shaping it. I was going to make another porringer but given the size of the resulting blank, I decided to make her a simple wooden bowl, similar to bowls made in England several hundred years ago. This isn't a reproduction or replica per se, simply a bowl based on those earlier designs with some modern touches to make it easy to use and maintain:


I've cut the bowl down more and created a rim and left a shorter foot so it doesn't sit so tall. That should make it easier to eat out of:

This what it looks like from the side. And you can get a better sense of the color of the wood.

This evening my nephew Michael and I are going to hollow it out and get it ready for drying and finishing in the coming weeks.
Stay tuned,
VW
Sharing Wood Turning
Good Morning all,
Well, it was a wild, windy night here last night. The wind blew hard last night and all of the leaves are probably in Wisconsin now!
I have some family visiting at the moment and one member, my nephew, is a charming young man named Michael. He's in high school and he really wants to work with his hands when graduates. Yesterday evening I was down in the wood shop working on a bowl when he came down and asked if he could watch and of course I said YES!! please do.
To make a long story short, we talked a lot about wood turning and I have him looking at wood turning books and today we're going to work on the bowl together. I think there is definitely a spark there.
Is it possible I've found an apprentice?
Stay tuned for future postings on this subject.
VW
Friday, November 8, 2013
Spitting logs and getting ready for more turning on a cold November afternoon
Hi Everyone,
I've had a large section of a box elder tree trunk and a large linden tree branch in the wood shop for a while now that have needed to be split and cut into bowl blanks. So my youngest son Ollie, aka The Critter, and I decided to go down to the wood shop and split the logs and get going.
Here's some photos of the splitting:
Here is the linden tree branch and splitting this is easy to do. I always begin by driving an axe into the edge of on of the ends to the branch and open up a big crack. You'll wind up with either a crack across the face of the branch or along the length of the branch:

In this case, a crack opened up along the shaft of the branch. When it did we started hammering splitting wedges into the crack and opened it up:

And viola! It broke apart. It took us about 5 minutes of hammering away:

This is the box elder tree trunk. This had developed a crack along the long axis of the trunk and so we did the same thing-insert wedges into the crack and hammer away:

...almost there...

And BAM! it falls apart. The sections are now narrow enough to cut on a bandsaw or cut by hand with a carpenter's saw into blanks (see the next posting):

And this is the Critter. Axe in hand. Smile on face. The family that splits logs together stays together:

Ok, there's a reason for all this craziness and we'll talk about this in the next blog posting.
VW
Thursday, November 7, 2013
The Porringer, continued
Good Afternoon,
I've had a really busy day today and between everything, I decided to go down to the wood shop and carve out the handles on the porringer and unwind a bit.
Here are the photos:
I went down and placed the porringer in my wood vice and carved away the waste wood between the handles. Normally soft maple isn't hard to carve but this particular piece of wood was harder than usual and it took me a while to carve the handles. You can see how they stand out from the bowl:

The inside of the bowl:

And this is the foot. I'm debating whether or not to turn off the foot and or to leave it on. Leaving it on will make it more stable on a table (yes, we do have tables!):

I'm probably going to give it a thin coat of salad bowl varnish as this tends to make cleaning and maintaining a bowl a lot easier.
The next porringer I make will be from a larger block of wood and so will have deeper handles than this one does and I'll post photos of that process.
Have a good rest of the evening,
VW-PS: I caved in and oiled it with flax seed oil:


Porringers-Discussion and Plans
Good Morning All,
Well, it's 30 degrees outside and the wood shop is really cold so I began this project yesterday and I'm doing it in stages because my hands get so cold!
Let's make a porringer.
What's a porringer?
Discussion
Porringers are small bowls that have handles that stick out from the rim and are designed to be held in the hand whilst eating food out of them-they resemble the American Sierra cup that are popular with hikers. UK pole turner Robin Wood in his marvelous book on bowls writes about porringers quite a bit. In the UK, in the medieval period, tables and other types of furniture were not very common so eating utensils were designed to be held in the hand. And of course the shape that works best for this is a small bowl with a round bottom. Later on when furniture and tables became common, plates and saucers with their board, flat shapes became the predominant design for eating utensils because they sit on a table better. These little bowls held whatever happened to be cooking in a kettle at the moment and they were produced by woodturners, an occupation that was very familiar to people, unlike today.
If you google the word porringer you'll see lots of metal ones and a few wooden ones and you'll see the ones that Robin Wood makes on his pole lathe.
And I have a cousin in California who has absolutely no idea what constitutes a proper bowl of oatmeal and I'm going to make her one a little later on and mail it to her (this is another story) along with a bag of steel cut oaks and a spurtle.
Plans
I have a small 6 x 6x 3" block of spalted soft maple and I'm going to turn a preliminary porringer from that and when I manage to get my hands on a larger block, I'll make one for my cousin and I'll do a posting about that. This will have two small handles on opposite sides of the rim and a small, broad foot on the bottom. And in homage to people who lived long, long ago, I'm going to make this a rougher and more rustic piece, which is probably what most porringers through history have looked like.
Here are the photos so far:
Here is the basic block of wood on the lathe. This is spalted soft maple, a favorite wood of mine. You can see I've roughly cut off the corners of the block:

Here is the same block with the side smoothed and trued up. I've marked off the rim and handle sections of the bowl:

This is a photograph of the backside of the bowl. You can see the foot and the bowl section taking shape. I haven't begun shaping the handles or rim yet:

In order for the bowl handles to be properly shaped I've turned the bowl over and begun cutting the rim away from the handle section. I'm not going to hollow out the bowl yet as I need the center mortise to re-mount the bowl again. The rim and the exterior of the bowl need to match up in terms of their shape so when the handles are created the bowl will look like one solid piece whose sides match up:

In this photo you can see that the bowl is wider than the rim. I'll narrow the bowl section some so the diameters are approximately equal to one another:

I put the camera down for a while and turned the outside and inside of the bowl and this was a back and forth process. The sides of the bowl and the rim now match up better and I've shaped the handle section in preparation for cutting the handles free of the bowl (more about that a little later on):

In this photo you can see how it will fit in the hand. It will fit better when I've created the handles for it. You can also see the foot in the very bottom of the photograph. I'm thinking of removing it later on as that would make it more comfortable to hold in the hand:

And this is a side view. I've added some coves to the bottom of the bowl to give the hand something to grip on to. I've also left the turning marks on the surface and I've just given it a very light sanding to remove any sharp edges. That's it for the sanding part of this:

The next step in the process is to create the handles by cutting away about half of the rim with a carving knife so this will be something that I'll do off the lathe.
As my hands are stiff from the cold, I'll do this a little later today when it warms up some.
Stay tuned,
VW
Subscribe to:
Posts (Atom)